How to Build Ethereum Dapp with React.js · Complete Step-By-Step Guide
By Gregory McCubbin ·
Hey everybody, it’s Gregory from Dapp University!
Today I'm going to show you how to build an Ethereum Dapp with React.js! Let's create a blockchain-based todo list application powered by Ethereum smart contracts on the blockchain. I'll walk you through step-by-step in the process from start to finish. We'll create the React app first, and then connect it to an Ethereum smart contract deployed to the blockchain.
This is a four part article that has a corresponding video for each section. You can watch me start building the React app in the first video above. I'll also guide you through the step-by-step instructions in this tutorial. You'll see the rest of the videos as you reach each section below.
Table of Contents
- Intro
- Tutorial Steps
How Our App Works
This tutorial is a continuation of previous tutorial where I show you how to build a full stack blockchain based todo list. We're going to use the smart contract from the previous tutorial as the starting point for the dapp that we'll build in this tutorial. You can follow along with the previous tutorial to create the todo list smart contract, or you can simply copy the source code to get started with this one. Either way, you'll need a copy of the Ethereum todo list smart contract to follow along with this tutorial.
Let me explain how the application will work that we'll build in this tutorial. We'll create a React.js application for the todo list that will talk directly to the smart contract on the blockchain. We'll use the Ethereum blockchain in this tutorial, which we can access by connecting our client side application to a single Ethereum node. The smart contract written in Solidity will powers the backend of the todo list. We'll connect to the blockchain network with our personal account using an Ethereum wallet in order to interact with the todo list application that we'll create.
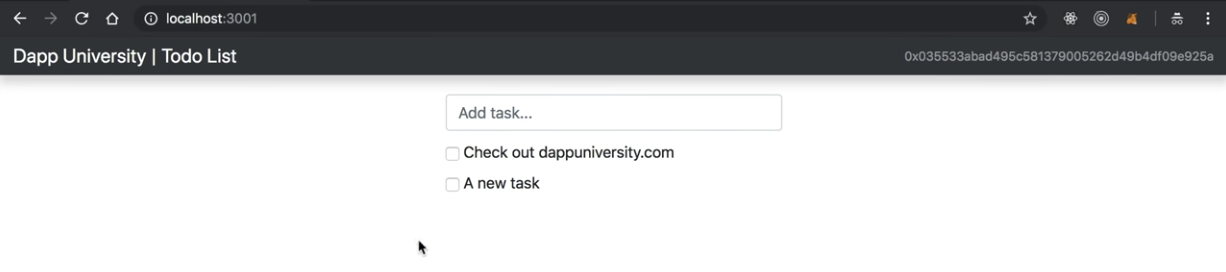
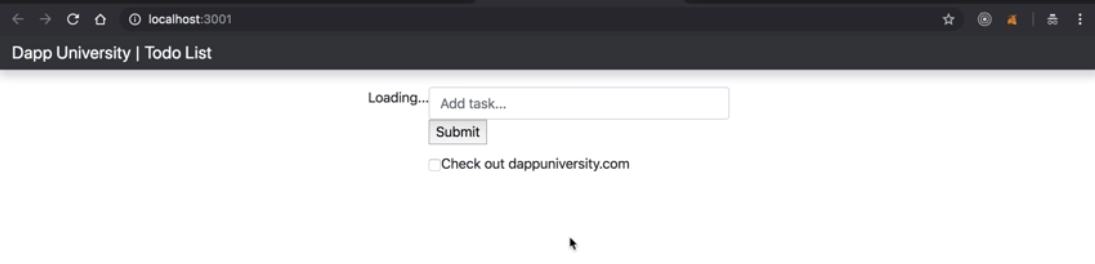
Application Preview
Here is a preview of the todo list application that we'll build in this tutorial. We'll be able to list out all of the tasks in the todo list, create new ones, and complete them.
Installing Dependencies
Now let's install all of the dependencies we need to build our project. First, we'll set up a person blockchain to develop the application locally.
Ganache Personal Blockchain
The dependency is a personal blockchain, which is a local development blockchain that can be used to mimic the behavior of a public blockchain. I recommend using Ganache as your personal blockchain for Ethereum development. It is available on Windows, Mac, and Linux as as a desktop application and a command line tool!
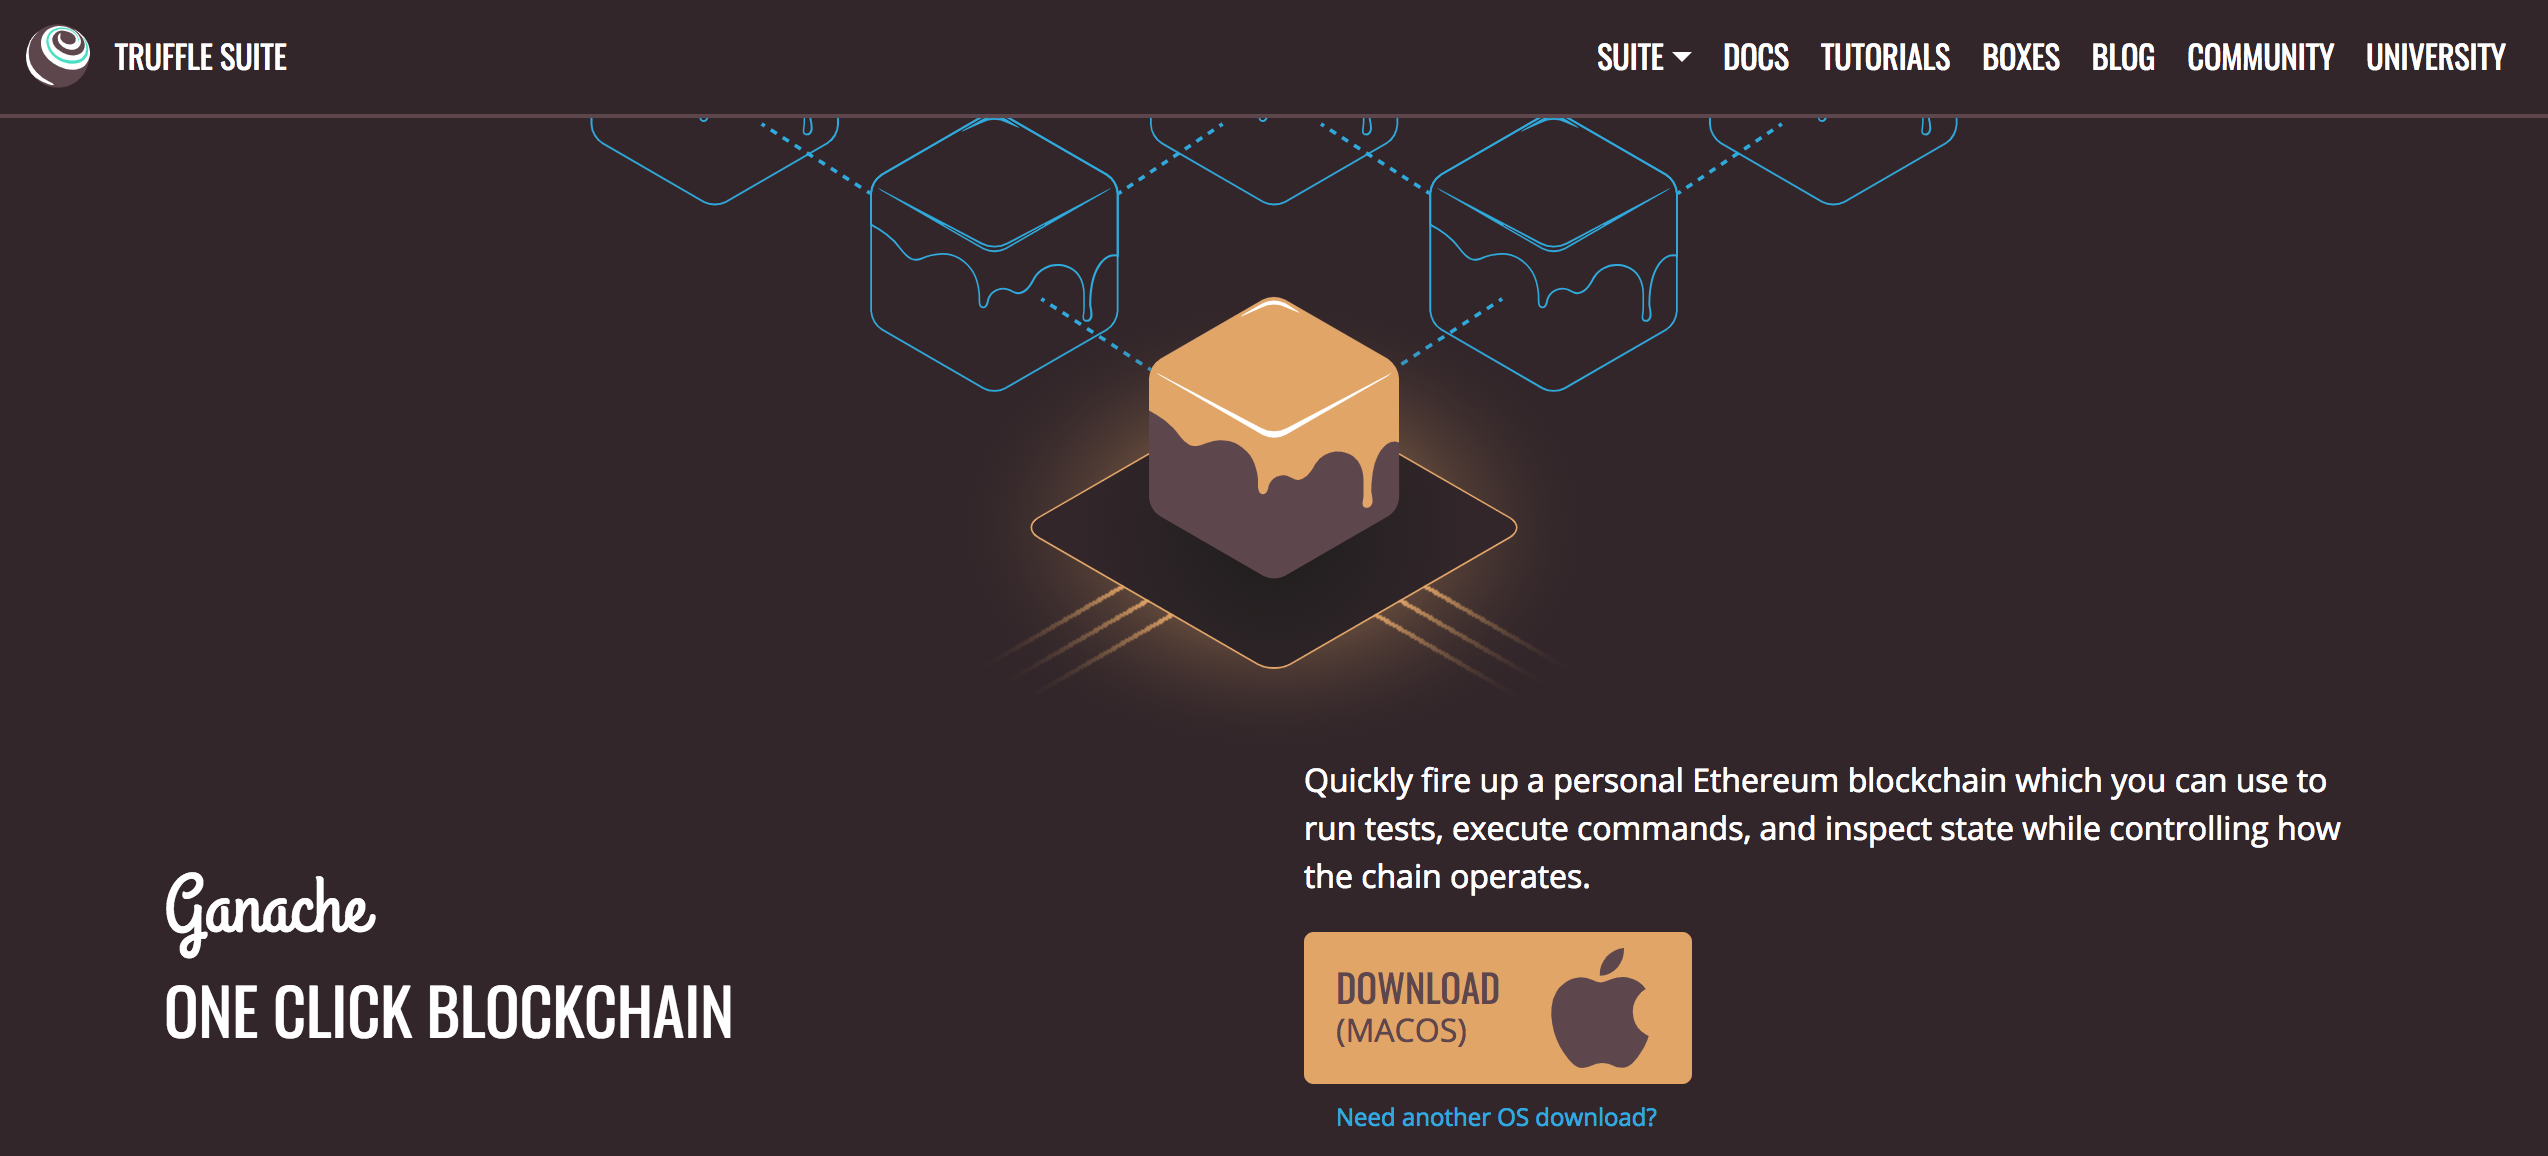
I'll walk you through setting up the desktop application in this tutorial. You can find the latest release for your operating system here. Once you've downloaded the archived package, extract the installer and run through the setup steps. Once you've installed it, you should see a this screen whenever you open it:

Yay! 🎉 Now you have a personal blockchain network running!/p>
Metamask Ethereum Wallet
Now it's time to turn your web browser into a blockchain browser. Most major web browsers do not currently connect to blockchain networks, so we'll have to install a browser extension that allows them to do this.

I'll the Metamask extension for Google Chrome. To install Metamask, visit this link or search for the Metamask Chrome plugin in the Google Chrome web store. Once you’ve installed it, be sure that it is checked in your list of extensions. You’ll see the fox icon in the top right hand side of your Chrome browser when it’s installed. Reference the video walk through if you get stuck!
Metamask will also allow us to manage our personal account when we connect to the blockchain, as well as manage our Ether funds that we'll need to pay for transactions.
Node.JS
Now that you have a private blockchain running, you need install Node Package Manager, or NPM, which comes with Node.js. You can see if you have node already installed by going to your terminal and typing:
$ node -vIf you don't have node already installed you can visit the Node.js website to download it.
Create React App
Next, you'll need to install Create React App, which will allow us to bootstrap a new React.js application without too much configuration. You can install it from the command line like this:
$ npm install create-react-appStep 1: Project Setup
Before you get started, ensure that Ganache is running, and that you deployed the todo list smart contract from the previous tutorial!
Now let's create the project! We'll do that with Create React App like this:
$ create-react-app eth-todo-list-react
$ cd eth-todo-list-react
Now we can run the web server that came with the react app to make sure that everything worked properly:
$ npm run startYour browser should open automatically. You should see a web page like this:
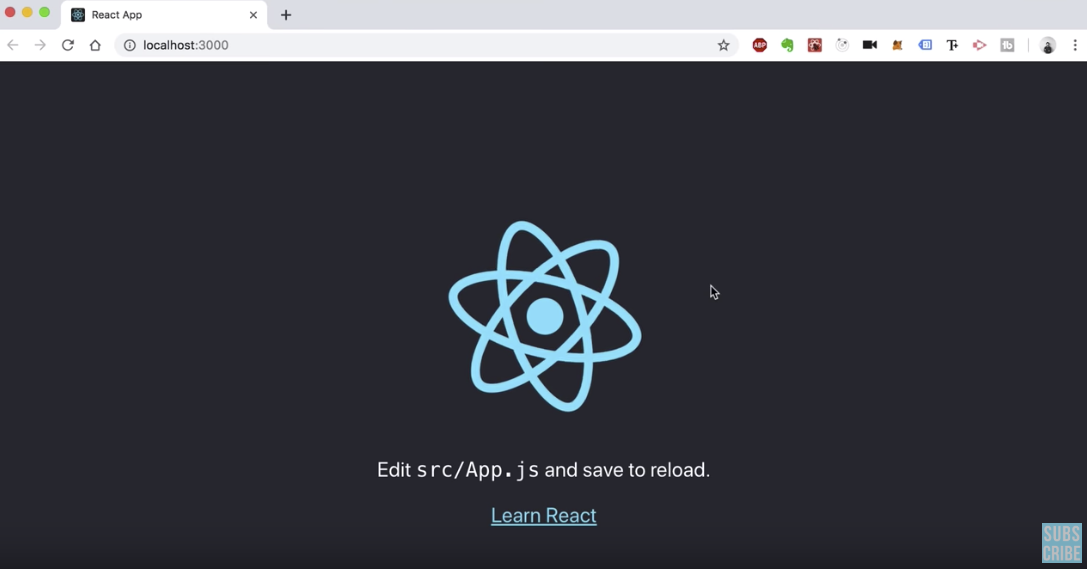
Great, that worked! Now let's update the package.json file to include all of the dependencies we need for the tutorial.
{
  "name": "eth-todo-list-react",
  "version": "0.1.0",
  "private": true,
  "dependencies": {
    "bootstrap": "^4.3.1",
    "react": "^16.8.3",
    "react-bootstrap": "^1.0.0-beta.5",
    "react-dom": "^16.8.3",
    "react-scripts": "2.1.5",
    "web3": "^1.0.0-beta.46"
  },
  "scripts": {
    "start": "react-scripts start",
    "build": "react-scripts build",
    "test": "react-scripts test",
    "eject": "react-scripts eject"
  },
  "eslintConfig": {
    "extends": "react-app"
  },
  "browserslist": [
    ">0.2%",
    "not dead",
    "not ie <= 11",
    "not op_mini all"
  ]
}
Now we can install these dependencies like this:
$ npm installJust make sure you restart your web server after installing these dependencies. Let me explain the two new dependencies we just installed.
- Web3.js - This is the main JavaScript library for communicating with the Ethereum blockchain. It will effectively turn our React application into a blockchain-enabled application. We'll use Web3 to interact with the todo list smart contract backend in this tutorial.
- React Bootstrap - This is the React version of the Bootstrap templating framework. It will allow us to create rich, interactive user interfaces without having to write a lot of CSS to get started.
Next, we need to further configure our app to import the bootstrap styles. Add this line to your index.js file:
import 'bootstrap/dist/css/bootstrap.css';Next, we'll clear out all of the default style sheets so that we don't conflict with bootstrap.
$ rm src/index.cssDon't forget to remove this from the imported files in src/App.js!
Then, we'll wipe out all of the css in side the
src/App.cssfile.
Now let's actually connect our app to the blockhain and list out the current account that we're connected with. In order to do this, let's clear out all of the code from the src/App.js file, and replace it with this code below:
import React, { Component } from 'react'
import Web3 from 'web3'
import './App.css'
class App extends Component {
componentWillMount() {
this.loadBlockchainData()
}
async loadBlockchainData() {
const web3 = new Web3(Web3.givenProvider || "http://localhost:8545")
const accounts = await web3.eth.getAccounts()
this.setState({ account: accounts[0] })
}
constructor(props) {
super(props)
this.state = { account: '' }
}
render() {
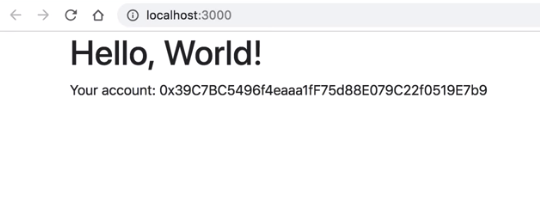
return (
<div className="container">
<h1l>Hello, World!</h1>
<p>Your account: {this.state.account}</p>
</div>
);
}
}
export default App;Let me explain what this code does.
- First, we import the web3 library at the top of the file with
import Web3 from 'web3'. - Next, we use React's build in
componentWillMount()
function to load all the blockhain data. This function gets called whenever the component will load properly the first time. React has many component and lifeycle functions which you can read about here. - Next, we connect to the blockchain by instantiating a new web3 connection, while passing in the url to Ganache
http://localhost:7545. - Then, we load the current account we're connected with. We add that to React's state object, which allows us to track the current state of the component.
- Finally, we read the account from the state object and render it within the HTML output from the
render()
function.
At this point, the application should look like this in the browser:
Step 2: List Tasks
Now let's list out the tasks from our smart contract todo list backend that's deployed to the blockchain. You can watch me do this on screen in the video above in addition to following the step-by-step instructions in this tutorial section.
In order to list the tasks out from the smart contract, we need two pieces of information.
- The smart contract ABI - this a JSON description of how the smart contract behaves. It describes its functions, behavior, etc...
- The smart contract address - this will be the address of the smart contract deployed to Ganache, the personal blockchain network. Make sure you deployed the smart contract to the blockchain already. You can follow the steps on how to do that in theprevious tutorial!
Let's create a new file to store these two pieces of information:
$ touch src/config.jsAdd the smart contract ABI and the smart contract address to the file like this. NOTE: You should use the actual address of the smart contract that you deployed to your own blockhain.
export const TODO_LIST_ADDRESS = 'YOUR_SMART_CONTRACT_ADDRESS_GOES_HERE'

export const TODO_LIST_ABI = [
  {
    "constant": true,
    "inputs": [
      {
        "name": "",
        "type": "uint256"
      }
    ],
    "name": "tasks",
    "outputs": [
      {
        "name": "id",
        "type": "uint256"
      },
      {
        "name": "content",
        "type": "string"
      },
      {
        "name": "completed",
        "type": "bool"
      }
    ],
    "payable": false,
    "stateMutability": "view",
    "type": "function",
    "signature": "0x8d977672"
  },
  {
    "constant": true,
    "inputs": [],
    "name": "taskCount",
    "outputs": [
      {
        "name": "",
        "type": "uint256"
      }
    ],
    "payable": false,
    "stateMutability": "view",
    "type": "function",
    "signature": "0xb6cb58a5"
  },
  {
    "inputs": [],
    "payable": false,
    "stateMutability": "nonpayable",
    "type": "constructor",
    "signature": "constructor"
  },
  {
    "anonymous": false,
    "inputs": [
      {
        "indexed": false,
        "name": "id",
        "type": "uint256"
      },
      {
        "indexed": false,
        "name": "content",
        "type": "string"
      },
      {
        "indexed": false,
        "name": "completed",
        "type": "bool"
      }
    ],
    "name": "TaskCreated",
    "type": "event",
    "signature": "0x05d0fb833127fc08168556d0e7ca9554fc3f6bc843b3b7d2bf1c35aea6bab660"
  },
  {
    "anonymous": false,
    "inputs": [
      {
        "indexed": false,
        "name": "id",
        "type": "uint256"
      },
      {
        "indexed": false,
        "name": "completed",
        "type": "bool"
      }
    ],
    "name": "TaskCompleted",
    "type": "event",
    "signature": "0xe21fa966ca5cd02748c0752352d18c48165e61cb55b4c29cccf924b5a95fcff1"
  },
  {
    "constant": false,
    "inputs": [
      {
        "name": "_content",
        "type": "string"
      }
    ],
    "name": "createTask",
    "outputs": [],
    "payable": false,
    "stateMutability": "nonpayable",
    "type": "function",
    "signature": "0x111002aa"
  },
  {
    "constant": false,
    "inputs": [
      {
        "name": "_id",
        "type": "uint256"
      }
    ],
    "name": "toggleCompleted",
    "outputs": [],
    "payable": false,
    "stateMutability": "nonpayable",
    "type": "function",
    "signature": "0x455f5024"
  }
]
Now let's import these values into our src/App.js file like this:
import { TODO_LIST_ABI, TODO_LIST_ADDRESS } from './config'Yay! Now we have everything we need to connect to our smart contract. We can connect to the todo list smart contract inside the
loadBlockchainData()function like this:
async loadBlockchainData() {
    const web3 = new Web3(Web3.givenProvider || "http://localhost:8545")
    const accounts = await web3.eth.getAccounts()
    this.setState({ account: accounts[0] })
    const todoList = new web3.eth.Contract(TODO_LIST_ABI, TODO_LIST_ADDRESS)
    this.setState({ todoList })
    const taskCount = await todoList.methods.taskCount().call()
    this.setState({ taskCount })
    for (var i = 1; i <= taskCount; i++) {
      const task = await todoList.methods.tasks(i).call()
      this.setState({
        tasks: [...this.state.tasks, task]
      })
    }
}
I'll explain how this works:
- First, we instantiate the smart contract with the ABI and the address with
const todoList = new web3.eth.Contract(TODO_LIST_ABI, TODO_LIST_ADDRESS), and store the result to the component state. - Then, we fetch the total number of tasks in the todo list to determine the number of times we want to call the
tasks()function to fetch each task (the only way to return all the tasks is to fetch them one by one). Then we fetch each task and store it to the component state.
Next, we set the default state in the component like this:
  constructor(props) {
    super(props)
    this.state = {
      account: '',
      taskCount: 0,
      tasks: []
    }
}
Next, we list the tasks out inside the render() function like this:
render() {
return (
  <div>
    <nav className="navbar navbar-dark fixed-top bg-dark flex-md-nowrap p-0 shadow">
      <a className="navbar-brand col-sm-3 col-md-2 mr-0" href="http://www.dappuniversity.com/free-download" target="_blank">Dapp University | Todo List</a>
      <ul className="navbar-nav px-3">
        <li className="nav-item text-nowrap d-none d-sm-none d-sm-block">
          <small><a className="nav-link" href="#"><span id="account"></span></a></small>
        </li>
      </ul>
    </nav>
    <div className="container-fluid">
      <div className="row">
        <main role="main" className="col-lg-12 d-flex justify-content-center">
          <div id="loader" className="text-center">
            <p className="text-center">Loading...</p>
          </div>
          <div id="content">
            <form>
              <input id="newTask" type="text" className="form-control" placeholder="Add task..." required />
              <input type="submit" hidden="" />
            </form>
            <ul id="taskList" className="list-unstyled">
              { this.state.tasks.map((task, key) => {
                return(
                  <div className="taskTemplate" className="checkbox" key={key}>
                    <label>
                      <input type="checkbox" />
                      <span className="content">{task.content}</span>
                    </label>
                  </div>
                )
              })}
            </ul>
            <ul id="completedTaskList" className="list-unstyled">
            </ul>
          </div>
        </main>
      </div>
    </div>
  </div>
);
Finally, we can replace all the styles in our src/App.css file with some custom styles like this:
main {
  margin-top: 60px;
}

form {
  width: 350px;
  margin-bottom: 10px;
}

ul {
  margin-bottom: 0px;
}

#completedTaskList .content {
  color: grey;
  text-decoration: line-through;
}
Now you should see tasks listed on the page in your web browser!
Step 3: Create Tasks
Now let's create new tasks with our todo list smart contract from our React.js application. You can watch me do this on screen in the video above in addition to following the step-by-step instructions in this tutorial section.
First, we'll start by creating a new component to manage the todo list like this:
$ touch src/TodoList.jsThen, we'll import that component inside the main App component like this:
import TodoList from './TodoList'Now, let's add some code for this todo list component. We'll move a lot of the code from the main App component into this file. We will preserve the "listing" behavior that we built into this component like this. What's critical about this section is that we'll wire up the form submission to create new tasks on the blockchain. Use this code below:
import React, { Component } from 'react'

class TodoList extends Component {

  render() {
    return (
      <div id="content">
        <form onSubmit={(event) => {
          event.preventDefault()
          this.props.createTask(this.task.value)
        }}>
          <input id="newTask" ref={(input) => this.task = input} type="text" className="form-control" placeholder="Add task..." required />
          <input type="submit" hidden={true} />
        </form>
        <ul id="taskList" className="list-unstyled">
          { this.props.tasks.map((task, key) => {
            return(
              <div className="taskTemplate" className="checkbox" key={key}>
                <label>
                  <input type="checkbox" />
                  <span className="content">{task.content}</span>
                </label>
              </div>
            )
          })}
        </ul>
        <ul id="completedTaskList" className="list-unstyled">
        </ul>
      </div>
    );
  }
}

export default TodoList;
The important part of this code to notice in this step is that we created an onSubmit handler for the form that gets triggered whenever a new task is added from the browser. Inside here, we call this.props.createTask(this.task.value). This a function that we'll define in the parent App component and pass down via props to the TodoList component.
Now, let's define the createTask() function in the parent component like this:
createTask(content) {
    this.setState({ loading: true })
    this.state.todoList.methods.createTask(content).send({ from: this.state.account })
    .once('receipt', (receipt) => {
      this.setState({ loading: false })
})
I'll explain what this does.
- First, it updates the loading state to
true. - Then, it calls the
createTask()function on the smart contract itself with web3.js. It tells the blockchain that it's coming from our account. Then, it updates the loading state tofalse
whenever the transaction receipt is returned.
Now, we must bind the function like this inside the constructor() function like this:
this.createTask = this.createTask.bind(this)And finally, render out the todo list component, passing the newly created function down via props like this:
<main role="main" className="col-lg-12 d-flex justify-content-center">
  { this.state.loading
    ? <div id="loader" className="text-center"><p className="text-center">Loading...</p></div>
    : <TodoList tasks={this.state.tasks} createTask={this.createTask} />
  }
</main>
Finally, we can keep track of the loading state by first setting default state in the constructor() function:
constructor(props) {
    super(props)
    this.state = {
      account: '',
      taskCount: 0,
      tasks: [],
      loading: true
}
Then, set it to false whenever the blockchain data is loaded from the loadBlockchainData() function.
this.setState({ loading: false })Yay! Now you can create todo items with the smart contract.
Step 4: Complete Tasks
Now let's finish the final step, which is to mark tasks as completed on our todo list smart contract from our React.js application. You can watch me do this on screen in the video above in addition to following the step-by-step instructions in this tutorial section.
We can toggle tasks as completed by triggering an onClick event for the task's checkbox that will call a toggleCompleted() function that we'll define inside the parent App component, much like we did in the previous step when we created a new task with the form.
We can replace the checkbox form input with the following code:
<input
  type="checkbox"
  name={task.id}
  defaultChecked={task.completed}
  ref={(input) => {
    this.checkbox = input
  }}
  onClick={(event) => {
    this.props.toggleCompleted(this.checkbox.name)
}}/>
Now, we can create the
toggleCompleted()function in the parent
App component like this:
toggleCompleted(taskId) {
    this.setState({ loading: true })
    this.state.todoList.methods.toggleCompleted(taskId).send({ from: this.state.account })
    .once('receipt', (receipt) => {
      this.setState({ loading: false })
    })
}
This works a lot like the createTask() function we created in the previous section. It calls the smart contract function with the current account, and manages the component loading state.
Finally, we must bind the newly created function to the component like this:
this.toggleCompleted = this.toggleCompleted.bind(this)Now, your COMPLETED todo list application should look like this:
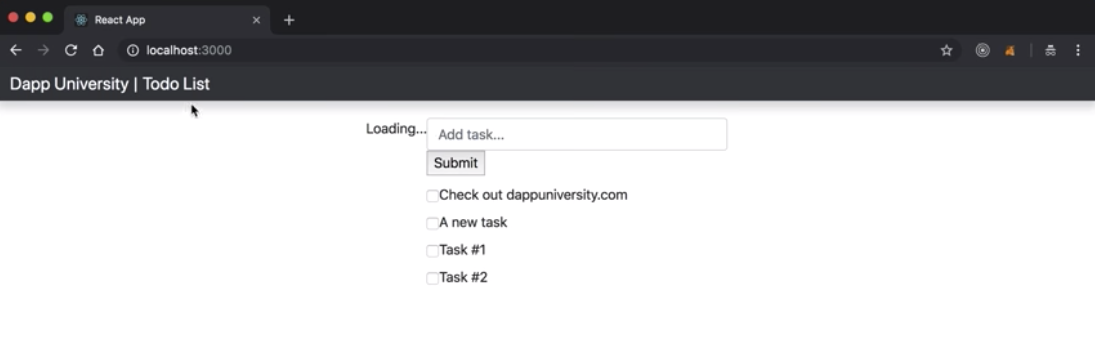
Congratulations! 🎉 You have successfully built a full stack blockchain application powered by Ethereum smart contracts! You can download the full source code to this tutorial here.
Happy with this tutorial? Then you NEED to join my free training here where I'll show you how to build a real world blockchain app so that you can become a highly paid blockchain developer!