How to Build Blockchain App - Ethereum Todo List 2019
By Gregory McCubbin ·
Hey everybody, it’s Gregory from Dapp University!
Today I'm going to show you how to build your first blockchain application! Let's create a todo list powered by Ethereum smart contracts. First, we'll create a smart contract with the Solidity programming language. Then, we'll write tests against the smart contract, and deploy it to a blockchain. Finally, we'll create a client side application to for the todo list.
You can watch me build the full blockchain application in the 90-minute video above. I'll also guide you through the step-by-step instructions in this tutorial. Before we start building our dApp, let me first explain how a blockchain application works. If you are eager to start programming, you can skip ahead to the next part of the tutorial. 😀
Table of Contents
- Introduction
- Tutorial Steps
How Does a Blockchain Application Work?
I've chosen a todo list application for this tutorial because it is one of the most common ways to learn any new programming language. It will teach us how to read and write data from the blockchain, as well as execute business logic that will govern the behavior of our todo list application. It will teach you the fundamentals about how a blockchain works and how to write Ethereum smart contracts.
In order to understand how a blockchain application works, let's first look at how a todo list might work as a web application. To access the todo list, you would use a web browser that would communicate with a web server over the Internet. The server contains all of the code and data for the todo list.

Here is a list of what you would find on the server:
- Client side files in HTML, CSS, and JavaScript
- Back end code responsible for the application's business logic
- Database that stores the tasks in the todo list
This server is a centralized entity that full control over every aspect of the application. Anyone with full access to the server can change any part of the code or the data at any time. A blockchain application works quite differently. All of the code and the data to the todo list does not lie on a centralized server. Instead, it is distributed across the blockchain. All of the code and the data is shared and unchangeable on the blockchain.
To illustrate this, let's examine how our blockchain-based todo list will work.
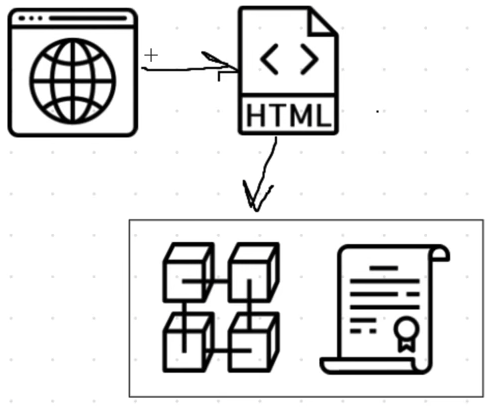
To access the blockchain todo list, we'll use a web browser to talk to the client side application, which will be written in HTML, CSS, and JavaScript. Instead of talking to a back end web server, the client side application will talk directly to the blockchain.
What is a Blockchain?
A blockchain is a peer-to-peer network of computers, or nodes, that talk to one another. It's a distributed network where all of the participants share the responsibility of running the network. Each network participant maintains a copy of the code and the data on the blockchain. All of this data is contained in bundles of records called "blocks" which are "chained together" to make up the blockchain. All of the nodes on the network ensure that this data is secure and unchangeable, unlike a centralized application where the code and data can be changed at any time. That's what makes the blockchain so powerful! Because the blockchain is responsible for storing data, it fundamentally is a database. And because it's a network of computers that talk to one another, it's a network. You can think of it as a network and a database all in one.
I should also highlight another fundamental distinction between traditional web applications and blockchain applications: instead of being a user of the application itself, you are a user of the blockhain network. The application does not manage any user data. That is the responsibility of the blockchain!
What is a Smart Contract
All of the code on the blockchain is contained in smart contracts, which are programs that run on the blockchain. They are the building blocks of blockchain applications. We'll write a smart contract in this tutorial to power our todo list. It will be responsible for fetching all of the tasks in our todo list from the blockchain, adding new tasks, and completing tasks.
Smart contracts are written in a programming language called Solidity, which looks a lot like JavaScript. All of the code in the smart contract is immutable, or unchangeable. Once we deploy the smart contract to the blockchain, we won't be able to change or update any of the code. This is a design feature that ensures that the code is trustless and secure. I often compare smart contracts to microservices on the web. They act as an interface for reading and writing data from the blockchain, as well as executing business logic. They're publicly accessible, meaning anyone with access to the blockchian can access their interface.
How Blockchain Todo List Works
Let's recap to understand how the application will work that we'll build in this tutorial. We'll create a client side application for the todo list that will talk directly to the blockchain. We'll use the Ethereum blockchain in this tutorial, which we can access by connecting our client side application to a single Ethereum node. We'll write a smart contract in Solidity that powers the todo list, and we'll deploy it to the Ethereum blockchain. We'll also connect to the blockchain network with our personal account using an Ethereum wallet in order to interact with the todo list application.
Application Preview
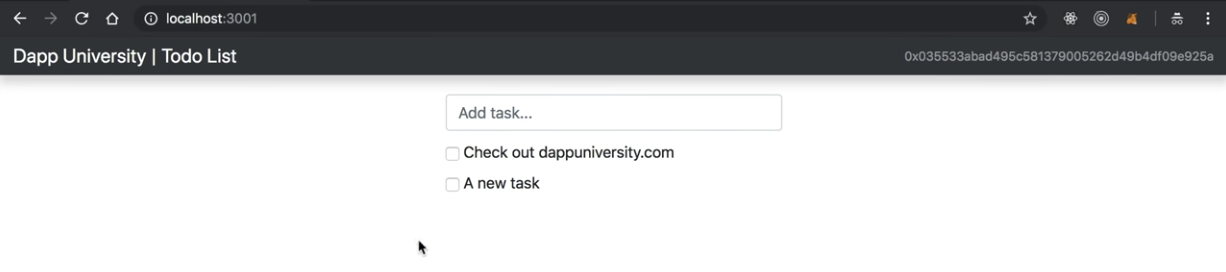
Here is a preview of the todo list application that we'll build in this tutorial. We'll be able to list out all of the tasks in the todo list, create new ones, and complete them.
Installing Dependencies
Now let's install all of the dependencies we need to build our project. First, we'll set up a person blockchain to develop the application locally.
Ganache Personal Blockchain
The dependency is a personal blockchain, which is a local development blockchain that can be used to mimic the behavior of a public blockchain. I recommend using Ganache as your personal blockchain for Ethereum development. It will allow you to deploy smart contracts, develop applications, and run tests. It is available on Windows, Mac, and Linux as as a desktop application and a command line tool!
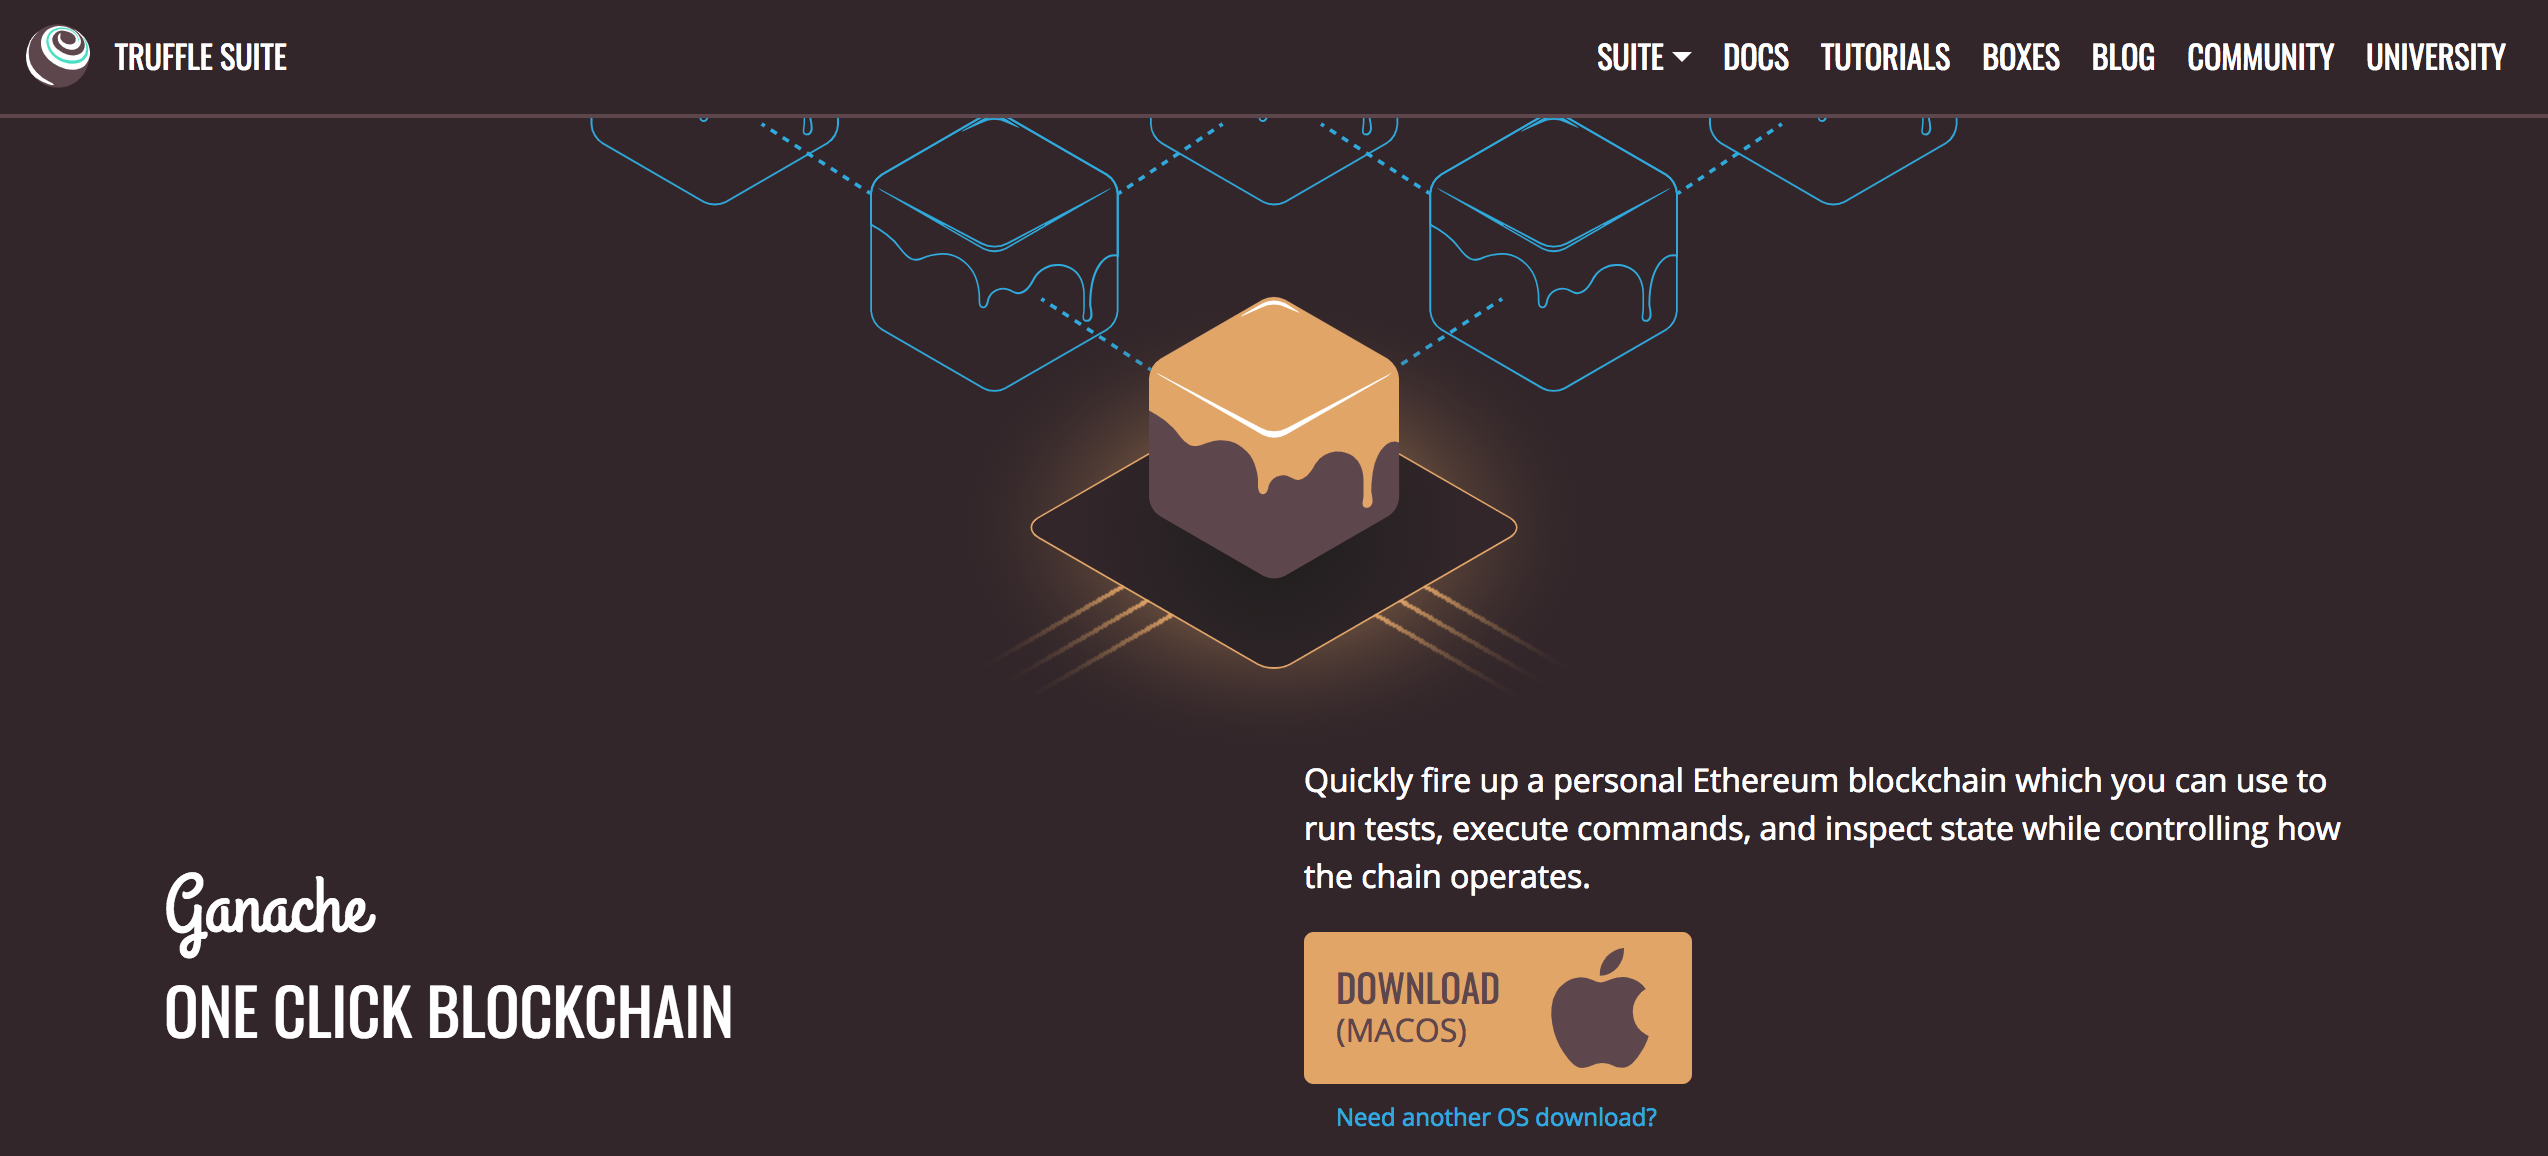
I'll walk you through setting up the desktop application in this tutorial. You can find the latest release for your operating system here. Once you've downloaded the archived package, extract the installer and run through the setup steps. Once you've installed it, you should see a this screen whenever you open it:

Yay! 🎉 Now you have a personal blockchain network running! You can see some details about the server Ganache is running on, along with a list of accounts connected to the network. Each account has been credited with 100 ether. This is a huge time saver! If you were to you create your own personal blockchain network from scratch, or develop your application on a test network, you would have to create all 10 accounts manually and credit each account with ether. Thankfully Ganache has already done this for us so that we don't have to worry about it.
Node.JS
Now that you have a private blockchain running, you need to configure your environment for developing smart contracts. The first dependency you'll need is Node Package Manager, or NPM, which comes with Node.js. You can see if you have node already installed by going to your terminal and typing:
$ node -vIf you don't have node already installed you can visit the Node.js website to download it.
Truffle Framework
Now let's install the Truffle Framework, which provides a suite of tools for developing Ethereum smart contacts with the Solidity programming language.
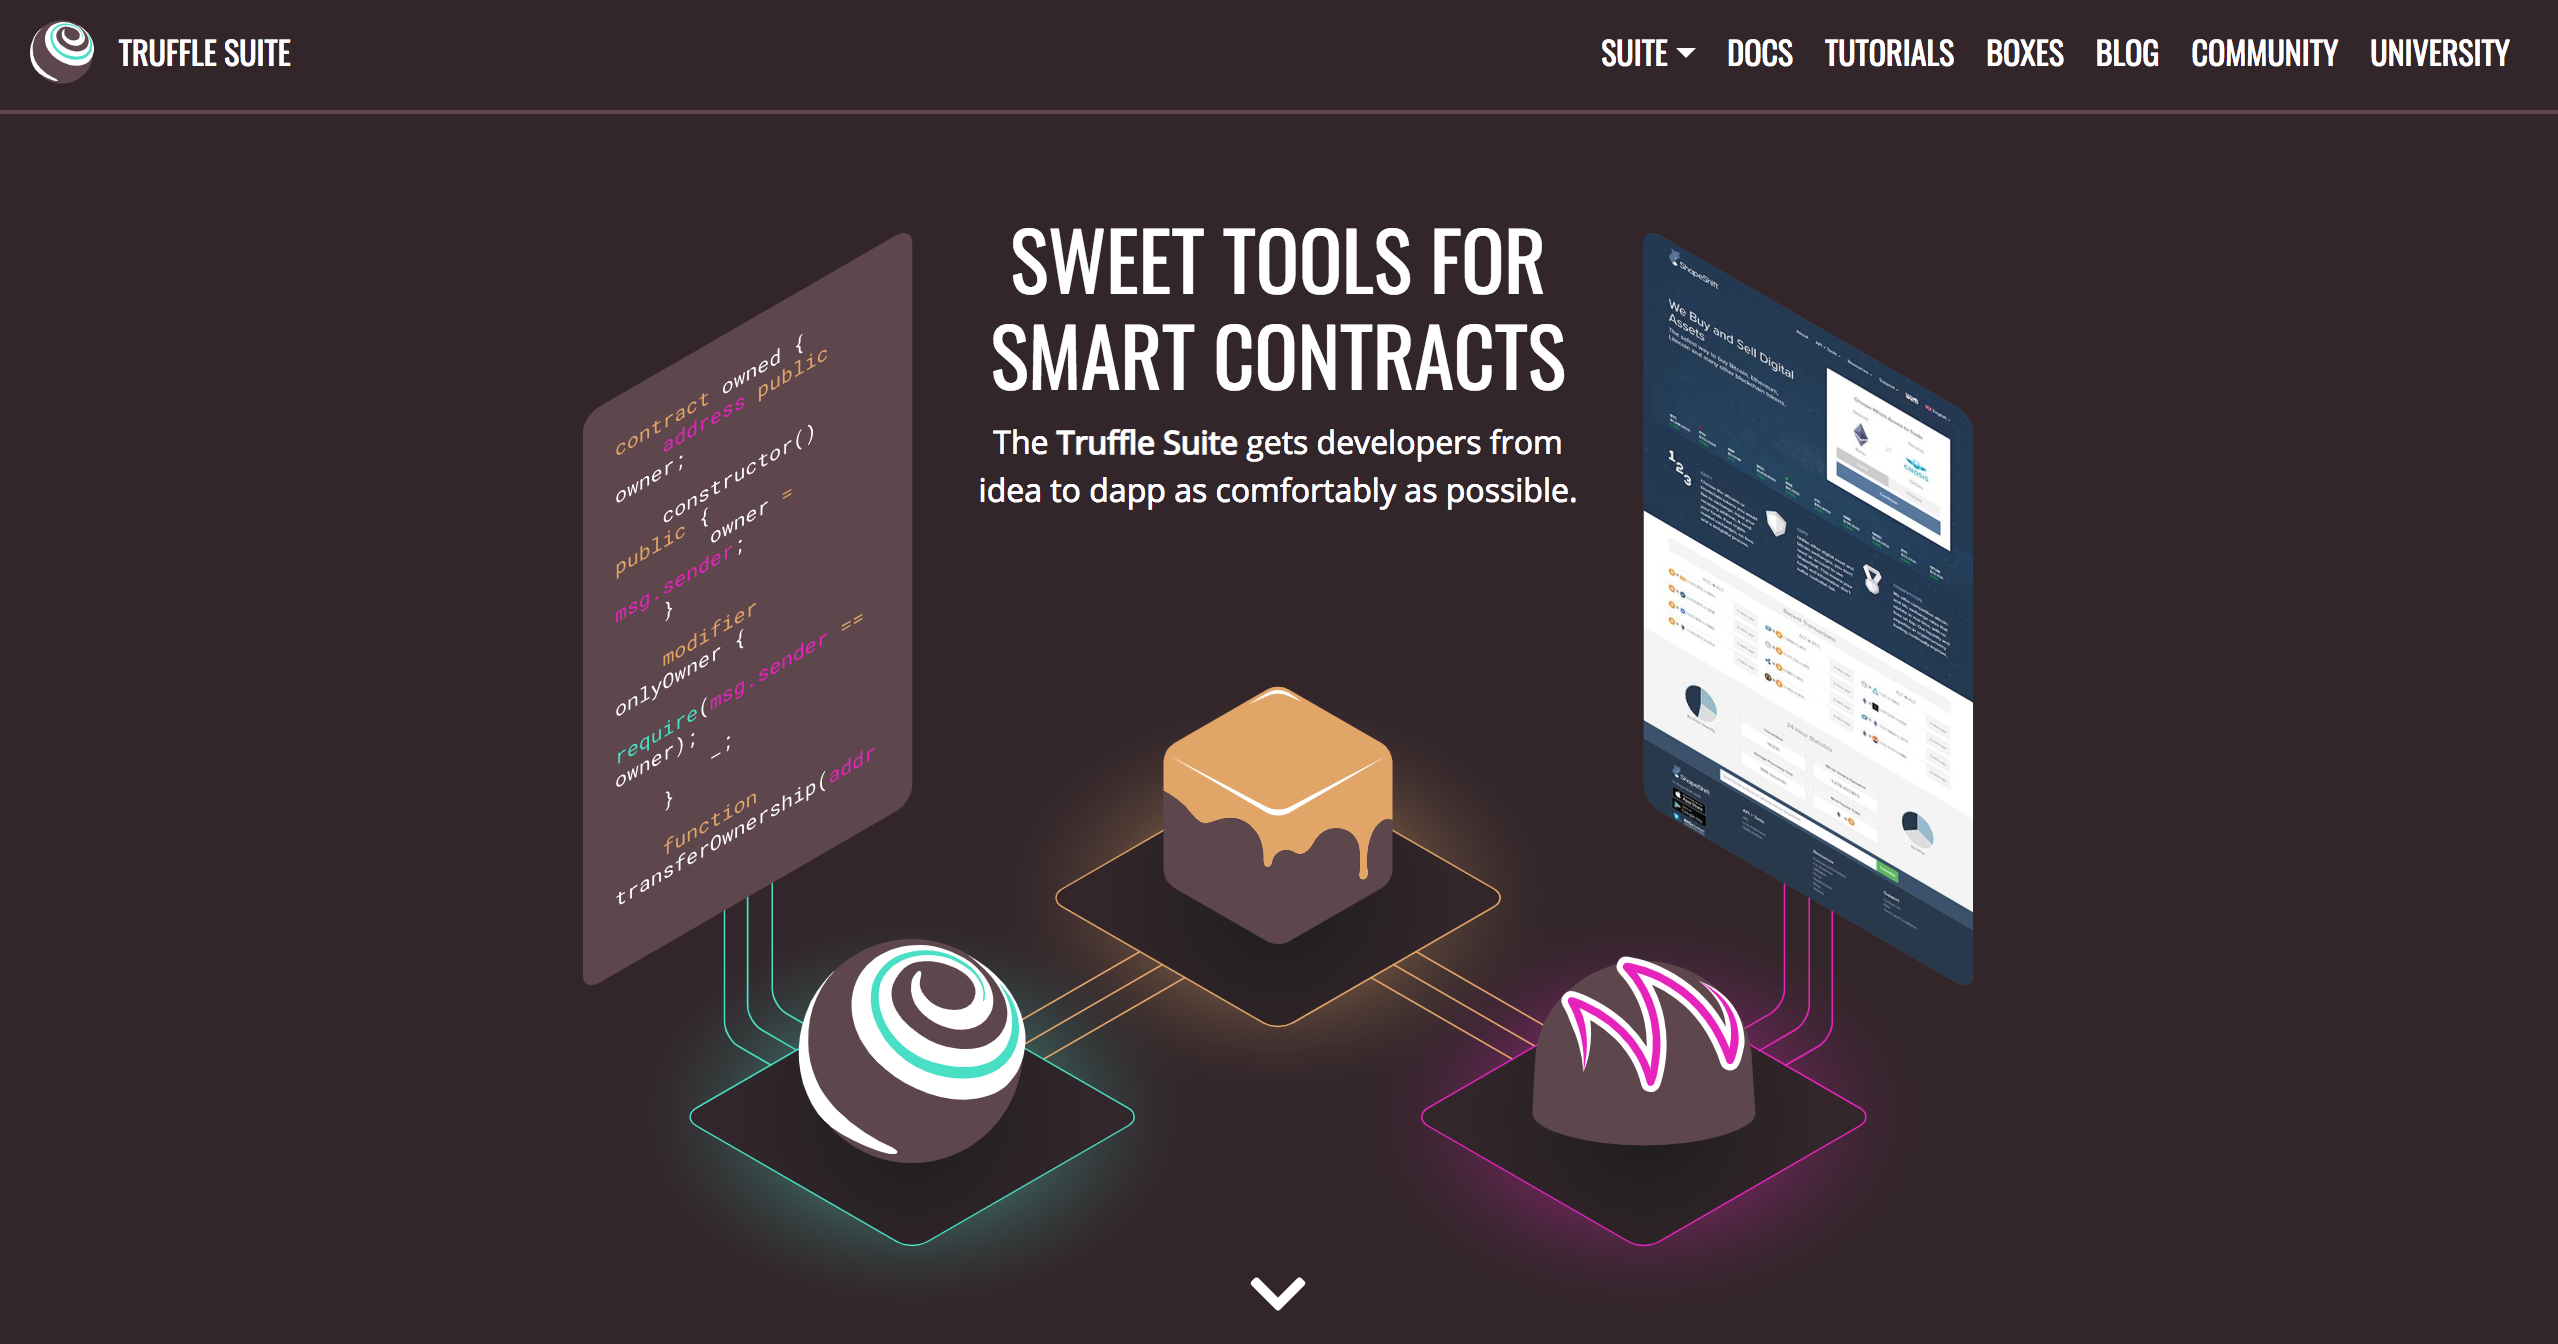
Here is an overview of all the functionality we'll get with the Truffle Framework:
- Smart Contract Management - write smart contracts with the Solidity programming language and compile them down to bytecode that be run on the Ethereum Virtal Machine (EVM).
- Automated Testing - write tests against your smart contracts to ensure that they behave the way you want them to. These tests can be written in JavaScript or Solidity, and can be run against any network configured by Truffle, including public blockchain networks.
- Deployment & Migrations - write scripts to migrate and deploy smart contracts to any public Ethereum blockchain network.
- Network Management - connect to any public Ethereum blockchain network, as well as any personal blockchain network you might use for development purposes.
- Development Console - interact with smart contracts inside a JavaScript runtime environment with the Truffle Console. You can connect to any blockchain network that you've specified within your network configuration to do this.
- Script Runner - write custom scripts that can run against a public blockchain network with JavaScript. You can write any arbitrary code inside this file and run it within your project.
- Client Side Development - configure your truffle project to host client side applications that talk to your smart contracts deployed to the blockchain.
You can install Truffle with NPM in your command line like this. NOTE: It's important to use this exact version of truffle specified below in order to follow along with this tutorial.
$ npm install -g [email protected]Metamask Ethereum Wallet
Now it's time to turn your web browser into a blockchain browser. Most major web browsers do not currently connect to blockchain networks, so we'll have to install a browser extension that allows them to do this.
I'll the Metamask extension for Google Chrome. To install Metamask, visit this link or search for the Metamask Chrome plugin in the Google Chrome web store. Once you’ve installed it, be sure that it is checked in your list of extensions. You’ll see the fox icon in the top right hand side of your Chrome browser when it’s installed. Reference the video walk through if you get stuck!
Metamask will also allow us to manage our personal account when we connect to the blockchain, as well as manage our Ether funds that we'll need to pay for transactions.
Project Setup
The accompanying video footage for this portion of the tutorial begins at 9:26.
Now let's create the project! I'll first create a project directory, and enter into it like this:
$ mkdir eth-todo-list
$ cd eth-todo-list
Now we initialize a new truffle project to develop our project like this:
$ truffle initGreat! Your terminal output should show that the project was created successfully. You can open your text editor and see that some new files and directories were created once you ran that command. Now let's create a package.json file to install some development dependencies that will need for the project. You can do that from the command line like this:
$ touch package.jsonYou can bootstrap all of the dependencies for your project by simply copy-and-pasting the code below into your package.json file:
{
  "name": "eth-todo-list",
  "version": "1.0.0",
  "description": "Blockchain Todo List Powered By Ethereum",
  "main": "truffle-config.js",
  "directories": {
    "test": "test"
  },
  "scripts": {
    "dev": "lite-server",
    "test": "echo \"Error: no test specified\" && sexit 1"
  },
  "author": "[email protected]",
  "license": "ISC",
  "devDependencies": {
    "bootstrap": "4.1.3",
    "chai": "^4.1.2",
    "chai-as-promised": "^7.1.1",
    "chai-bignumber": "^2.0.2",
    "lite-server": "^2.3.0",
    "nodemon": "^1.17.3",
    "truffle": "5.0.2",
    "truffle-contract": "3.0.6"
  }
}
Now you can install the dependencies from the command line like this:
$ npm installNow that the dependencies are installed, let's examine the project directory structure that we just created:
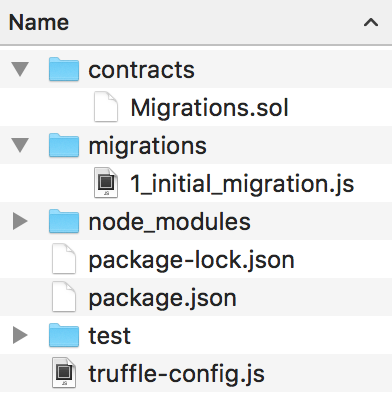
- contracts directory: this is where all smart contacts live. We already have a Migration contract that handles our migrations to the blockchain.
- migrations directory: this is where all of the migration files live. These migrations are similar to other web development frameworks that require migrations to change the state of a database. Whenever we deploy smart contracts to the blockchain, we are updating the blockchain's state, and therefore need a migration.
- node_modules directory: this is the home of all of our Node dependencies we just installed.
- test directory: this is where we'll write our tests for our smart contract.
- truffle-config.js file: this is the main configuration file for our Truffle project, where we'll handle things like network configuration.
Now let's start developing the smart contract that will manage our todo list. We can do this by creating a new file in the contracts directory like this:
$ touch ./contracts/TodoList.solInside here, let's develop our todo list smart contract. First, we'll start by specifying the version like this:
pragma solidity ^0.5.0;Now we can declare the smart contract like this:
pragma solidity ^0.5.0;

contract TodoList {
    // Code goes here...
}
We create a smart contract called TodoList followed by curly braces. We'll add all of the code for the smart contract inside of them. The thing we'll do is just keep track of the number of tasks inside the todo list. This will allow us to write some simple code that will help us ensure that the project is set up properly, and that our code is working on the blockchain. We'll simply create a state variable called taskCount to track the number of tasks like this:
pragma solidity ^0.5.0;

contract TodoList {
  uint taskCount;
}
Here taskCount is a special kind of variable called a "state variable". Any data that we store inside this state variable is written to storage on the blockchain. It changes the smart contract's state, and has scope within the entire smart contract, as opposed to local variables which only have scope inside of functions. We can set a default value of 0 for this state variable like this:
pragma solidity ^0.5.0;

contract TodoList {
  uint taskCount = 0;
}
Now, we can create a way to access the value of this state variable outside of the contract. We can do this with a special modifier keyword called public in Solidity. When we do this, Solidity will magically create a taskCount() function so that we can access this variable's value outside of the smart contract. This will be useful when we are interacting with the smart contract in the console, from the client side application, and inside the test files.
Now let's compile the smart contract and ensure that there are no errors:
$ truffle compileYay! 🎉 You've just written your first Ethereum smart contract. You should notice that a new file was generated whenever you compiled the smart contract at the following path: `./build/contracts/TodoList.json`. This file is the smart contract ABI file, which stands for "Abstract Binary Interface". This file has many responsibilities, but two that I will highlight here:
- It contains the compiled bytecode version of the Solidity smart contract code that can be run on a the Ethereum Virtual Machine (EVM), i.e., an Ethereum Node.
- It contains a JSON representation of the smart contract functions that can be exposed to external clients, like client-side JavaScript applications.
Our next goal is to access the smart contract inside the Truffle console. However, we cannot run the Truffle console because our application is not yet connected to the Ganache personal blockchain network we set up in the dependencies section. To talk to the smart contract on the personal blockchain network inside the Truffle console, we must do a few things:
- Update our project's configuration file to specify the personal blockchain network we want to connect to (Ganache).
- Create a migration script that tells Truffle how to deploy the smart contract to the personal blockchain network.
- Run the newly created migration script, deploying the smart contract to the personal blockchain network.
First, we'll update the project configuration file to specify the personal blockchain network we want set up in the first section. Find the file truffle-config.js and paste the following code:
module.exports = {
  networks: {
    development: {
      host: "127.0.0.1",
      port: 7545,
      network_id: "*" // Match any network id
    }
  },
  solc: {
    optimizer: {
      enabled: true,
      runs: 200
    }
  }
}
Note: these should match the default settings provided by the Ganache personal blockchain network. If you changed any settings inside the Ganache settings page, like the port, those should be reflected here.
Next, we'll create a migration script inside the migrations directory to deploy the smart contract to the personal blockchain network. From your project root, create a new file from the command line like this:
$ touch migrations/2_deploy_contracts.jsLet me explain what this file does. Any time we create a new smart contract, we are updating the state of the blockchain. Remember, I said that a blockchain fundamentally is a database. Hence, whenever we permanently change it, we must migrate it from one state to another. This is very similar to a database migration that you might have performed in other web application development frameworks.
Notice that we number all of our files inside the migrations directory with numbers so that Truffle knows which order to execute them in. Inside this newly created migration file, you can use this code to deploy the smart contract:
var TodoList = artifacts.require("./TodoList.sol");

module.exports = function(deployer) {
  deployer.deploy(TodoList);
};
First, we require the contract we've created, and assign it to a variable called "TodoList". Next, we add it to the manifest of deployed contracts to ensure that it gets deployed when we run the migrations. Now let's run this migration script from the command line like this:
$ truffle migrateNow that we have successfully migrated the smart contract to the personal blockchain network, let's open the console to interact with the smart contract. You can open the truffle console from the command line like this:
$ truffle consoleNow that we're inside the console, let's get an instance of our deployed smart contract and see if we can read the taskCount from the contract. From the console, run this code:
todoList = await TodoList.deployed()Here TodoList is the name of the variable that we created in the migration file. We retrieved a deployed instance of the contract with the deployed() function, and assigned it to an todoList. Also, note the use of the await keyword. We must interact with the blockchain in an asynchronous fashion. Thus, JavaScript is an excellent choice for client-side interactions with blockchain smart contracts. There are several strategies for handling asynchronous actions in JavaScript. One of the most popular ways is the async/await pattern which I have chosen here. Truffle has recently released support for this inside the Truffle console. You can read more about the async/await pattern here.
First, we can get the address of the smart contract that was deployed to the blockchain like this:
todoList.address
// => '0xABC123...'
Now we can read the value of taskCount from the storage like this:
takCount = await app.taskCount()
// => 0
Yay! 🎉 You have successfully completed the first section of this tutorail. You have done all of the following:
- Set up your machine for blockchain development
- Created a new truffle project
- Created your first smart contract
- Interacted with your newly created smart contract on a live blockchain
If you got stuck on any of the steps, feel free to clone the project code for this section from github. You can also reference the video tutorial for this section starting here.
List Tasks
The accompanying video footage for this portion of the tutorial begins at 22:47.
Now let's start listing out the tasks in the todo list. Here are all of the steps that we'll complete in this section:
- Write code to list tasks in the smart contract
- List tasks from the smart contract inside the Truffle console
- List tasks in the client side application
- Write a test for listing tasks
In order to list the tasks inside the smart contract, we'll need a way to model a task in solidity. Solidity allows you to define your own data types with structs. We can model any arbitrary data with this powerful feature. We'll use a struct to model the task for our todo list like this:
pragma solidity ^0.5.0;

contract TodoList {
  uint public taskCount = 0;

  struct Task {
    uint id;
    string content;
    bool completed;
  }
}
First we model the task with the struct keyword followed by the name of the new struct Task. Note, that this does not represent an instance of a Task, but simply the definition of a Task struct. The lines contained in the curly braces define the attributes of the Task struct:
uint id- this is the unique identifier for the struct. It will have anid, just like a traditional database record. Note, we declare the data type for this identifiers as auint, which stands for "unsigned integer". This simply means that it is a non-negative integer. It has no "sign", i.e. a-or+sign, in front of it, implying that it is always positive.string content- this is the text of the task in the todo list contained in a string.bool completed- this is the checkbox status of the todo list, which istrue/false. If it istrue, the task will be "completed" or checked off from the todo list.
Now that we've modeled a task, we need a place to put all of the tasks in the todo list! We want to put them in storage on the blockchain so that the state of the smart contract will be persistent. We can access the blockchain's storage with with a state variable, just like we did with taskCount. We'll create a tasks state variable. It will use a special kind of Solidity data structure called a mapping like this:
pragma solidity ^0.5.0;

contract TodoList {
  uint public taskCount = 0;

  struct Task {
    uint id;
    string content;
    bool completed;
  }

  mapping(uint => Task) public tasks;
}
A mapping in Solidity is a lot like an associative array or a hash in other programming languages. It creates key-value pairs that get stored on the blockchain. We'll use a unique id as the key. The value will be the task it self. This will allow us to look up any task by id!
Now let's create a function for creating tasks. This will allow us to add new tasks to the todo list by default so that we can list them out in the console.
pragma solidity ^0.5.0;

contract TodoList {
  uint public taskCount = 0;

  struct Task {
    uint id;
    string content;
    bool completed;
  }

  mapping(uint => Task) public tasks;

  function createTask(string memory _content) public {
    taskCount ++;
    tasks[taskCount] = Task(taskCount, _content, false);
  }

}
I'll explain this function:
- First, we create the function with the
functionkeyword, and give it a namecreateTask() - We allow the function to accept one argument called
_content, which will be the text for the task. We specify that this argument will be ofstringdata type, and that it will persist inmemory - We set the function visibility to
publicso that it can be called outside of the smart contract, like in the console, or from the client side for example - Inside the function, we create an
idfor the new task. We simply take the existingtaskCountand increment it by 1. - Now we create a new task struct by calling
Task(taskCount, _content, false);and passing in the values for the new task. - Next, we store the new task on the blockchain by adding it to the
tasksmapping like this:task[taskCount] = ....
Now we want to add one task to the todo list whenever the smart contract is deployed to the blockchain so that it will have a default task that we can inspect in the console. We can do this by calling the createTask() function inside of the smart contract's constructor function like this:
    contract TodoList {
      // ....

      constructor() public {
        createTask("Check out dappuniversity.com");
      }

      // ....

    }
We create the constructor function with the constructor keyword as you can see above. This function will get run only once, whenever the contract is initialized, i.e., deployed to the blockchain. Inside of this function, we have created one new default task with the string content "Check out dappuniversity.com".
Now let's deploy this smart contract to the blockchain. In order to do this, we must deploy a new copy of our code. Remember, smart contract code is immutable! It cannot change. Therefore, we must create a new smart contract any time we make code changes. Luckily Truffle provides a shortcut to assist with this. We can re-run the migrations like this:
$ truffle migrate --resetViola! Now we have a new copy of the smart contract on the blockchain. Now let's list out the tasks in the console.
$ truffle consoleInside the console, let's get a deployed copy of the new smart contract.
todoList = await TodoList.deployed()Now we can get the task from the todo list by calling the tasks() function. This will allow us to access values from the tasks mapping by id. We will simply pass in the id of the first task in the list when we call this function:
task = await todoList.tasks(1)Yay! 🎉 How you can inspect the values of this task in the console. 😃
Now that we've migrated this smart contract to the blockchain, let's create the client side code to interact with the todo list smart contract. You'll need to create the following files for your project:
bs-config.jsonsrc/index.htmlsrc/app.js
We'll fill the code for all of these files one-by-one. We are using lite-server to serve all of the project files for the client side. We'll need to tell lite-server where all these files are located. We can do this by updating the browsersync configuration for lite-server inside the bs-config.json file. Paste this configuration into your project file:
{
  "server": {
    "baseDir": [
      "./src",
      "./build/contracts"
    ],
    "routes": {
      "/vendor": "./node_modules"
    }
  }
}
This configuration tells lite-server to expose all the files in the src and build/contracts directories to the root of our web server. It also adds an alias for any files in the node_modules directory to appear in the vendor route. This will allow us to pull in any project dependencies like bootstrap into the client side with the vendor route, which we'll see momentarily.
Now let's fill in HTML code for our todo list. This tutorial focuses primarily on blockchain technology, so I don't want to spend too much time on the HTML & CSS portion. I'll simply paste in the HTML code here:
<!DOCTYPE html>
<html lang="en">
  <head>
    <meta charset="utf-8">
    <meta http-equiv="X-UA-Compatible" content="IE=edge">
    <meta name="viewport" content="width=device-width, initial-scale=1">
    <!-- The above 3 meta tags *must* come first in the head; any other head content must come *after* these tags -->
    <title>Dapp University | Todo List</title>

    <!-- Bootstrap -->
    <link href="vendor/bootstrap/dist/css/bootstrap.min.css" rel="stylesheet">

    <!-- HTML5 shim and Respond.js for IE8 support of HTML5 elements and media queries -->
    <!-- WARNING: Respond.js doesn't work if you view the page via file:// -->
    <!--[if lt IE 9]>
      <script src="https://oss.maxcdn.com/html5shiv/3.7.3/html5shiv.min.js"></script>
      <script src="https://oss.maxcdn.com/respond/1.4.2/respond.min.js"></script>
    <![endif]-->

    <style>
      main {
        margin-top: 60px;
      }

      #content {
        display: none;
      }

      form {
        width: 350px;
        margin-bottom: 10px;
      }

      ul {
        margin-bottom: 0px;
      }

      #completedTaskList .content {
        color: grey;
        text-decoration: line-through;
      }
    </style>
  </head>
  <body>
    <nav class="navbar navbar-dark fixed-top bg-dark flex-md-nowrap p-0 shadow">
      <a class="navbar-brand col-sm-3 col-md-2 mr-0" href="http://www.dappuniversity.com/free-download" target="_blank">Dapp University | Todo List</a>
      <ul class="navbar-nav px-3">
        <li class="nav-item text-nowrap d-none d-sm-none d-sm-block">
          <small><a class="nav-link" href="#"><span id="account"></span></a></small>
        </li>
      </ul>
    </nav>
    <div class="container-fluid">
      <div class="row">
        <main role="main" class="col-lg-12 d-flex justify-content-center">
          <div id="loader" class="text-center">
            <p class="text-center">Loading...</p>
          </div>
          <div id="content">
         <!-- <form onSubmit="App.createTask(); return false;">
              <input id="newTask" type="text" class="form-control" placeholder="Add task..." required>
              <input type="submit" hidden="">
            </form> -->
            <ul id="taskList" class="list-unstyled">
              <div class="taskTemplate" class="checkbox" style="display: none">
                <label>
                  <input type="checkbox" />
                  <span class="content">Task content goes here...</span>
                </label>
              </div>
            </ul>
            <ul id="completedTaskList" class="list-unstyled">
            </ul>
          </div>
        </main>
      </div>
    </div>

    <!-- jQuery (necessary for Bootstrap's JavaScript plugins) -->
    <script src="https://ajax.googleapis.com/ajax/libs/jquery/1.12.4/jquery.min.js"></script>
    <!-- Include all compiled plugins (below), or include individual files as needed -->
    <script src="vendor/bootstrap/dist/js/bootstrap.min.js"></script>
    <script src="vendor/truffle-contract/dist/truffle-contract.js"></script>
    <script src="app.js"></script>
  </body>
</html>
This file scaffolds all of the HTML we need for the project. I have commented-out the form code which we'll enable in a later section. The file pulls in all of the dependencies for the project like the bootstrap templating framework that will allow us to create nice-looking UI elements without having to write too much CSS. It also uses the Truffle Conract library that will allow us to interact with the todo list smart contract wiht JavaScript.
Now let's fill in the JavaScript code for this section. We'll add code to the newly created app.js file like this:
App = {
  loading: false,
  contracts: {},

  load: async () => {
    await App.loadWeb3()
    await App.loadAccount()
    await App.loadContract()
    await App.render()
  },

  // https://medium.com/metamask/https-medium-com-metamask-breaking-change-injecting-web3-7722797916a8
  loadWeb3: async () => {
    if (typeof web3 !== 'undefined') {
      App.web3Provider = web3.currentProvider
      web3 = new Web3(web3.currentProvider)
    } else {
      window.alert("Please connect to Metamask.")
    }
    // Modern dapp browsers...
    if (window.ethereum) {
      window.web3 = new Web3(ethereum)
      try {
        // Request account access if needed
        await ethereum.enable()
        // Acccounts now exposed
        web3.eth.sendTransaction({/* ... */})
      } catch (error) {
        // User denied account access...
      }
    }
    // Legacy dapp browsers...
    else if (window.web3) {
      App.web3Provider = web3.currentProvider
      window.web3 = new Web3(web3.currentProvider)
      // Acccounts always exposed
      web3.eth.sendTransaction({/* ... */})
    }
    // Non-dapp browsers...
    else {
      console.log('Non-Ethereum browser detected. You should consider trying MetaMask!')
    }
  },

  loadAccount: async () => {
    // Set the current blockchain account
    App.account = web3.eth.accounts[0]
  },

  loadContract: async () => {
    // Create a JavaScript version of the smart contract
    const todoList = await $.getJSON('TodoList.json')
    App.contracts.TodoList = TruffleContract(todoList)
    App.contracts.TodoList.setProvider(App.web3Provider)

    // Hydrate the smart contract with values from the blockchain
    App.todoList = await App.contracts.TodoList.deployed()
  },

  render: async () => {
    // Prevent double render
    if (App.loading) {
      return
    }

    // Update app loading state
    App.setLoading(true)

    // Render Account
    $('#account').html(App.account)

    // Render Tasks
    await App.renderTasks()

    // Update loading state
    App.setLoading(false)
  },

  renderTasks: async () => {
    // Load the total task count from the blockchain
    const taskCount = await App.todoList.taskCount()
    const $taskTemplate = $('.taskTemplate')

    // Render out each task with a new task template
    for (var i = 1; i <= taskCount; i++) {
      // Fetch the task data from the blockchain
      const task = await App.todoList.tasks(i)
      const taskId = task[0].toNumber()
      const taskContent = task[1]
      const taskCompleted = task[2]

      // Create the html for the task
      const $newTaskTemplate = $taskTemplate.clone()
      $newTaskTemplate.find('.content').html(taskContent)
      $newTaskTemplate.find('input')
                      .prop('name', taskId)
                      .prop('checked', taskCompleted)
                      // .on('click', App.toggleCompleted)

      // Put the task in the correct list
      if (taskCompleted) {
        $('#completedTaskList').append($newTaskTemplate)
      } else {
        $('#taskList').append($newTaskTemplate)
      }

      // Show the task
      $newTaskTemplate.show()
    }
  },

  setLoading: (boolean) => {
    App.loading = boolean
    const loader = $('#loader')
    const content = $('#content')
    if (boolean) {
      loader.show()
      content.hide()
    } else {
      loader.hide()
      content.show()
    }
  }
}

$(() => {
  $(window).load(() => {
    App.load()
  })
})
Let me explain this code. We have created a new App object that contains all the functions we need to run the JavaScript app. I will explailn the important functions here. For full explanation, watch me explain the JavaScript code in the video at 40:25. Also note that I have commented out a few lines of code that we will enable in later sections.
loadWeb3()web3.js is a JavaScript library that allows our client-side application to talk to the blockchain. We configure web3 here. This is default web3 configuration specified by Metamask. Do not worry if you don't completely understand what is happening here. This is a copy-and-paste implementation that Metamask suggests.loadContract()This is where we load the smart contract data from the blockchain. We create a JavaScript representation of the smart conract wit the Truffle Contract library. Then we load the smart contract data with web3. This will allow us to list the tasks in the todo list.renderTasks()This is where we actually list the tasks in the todo list. Notice that we create a for loop to access each task individually. That is because we cannot fetch the entire tasks mapping from the smart contract. We must first determine thetaskCountand fetch each task one-by-one.
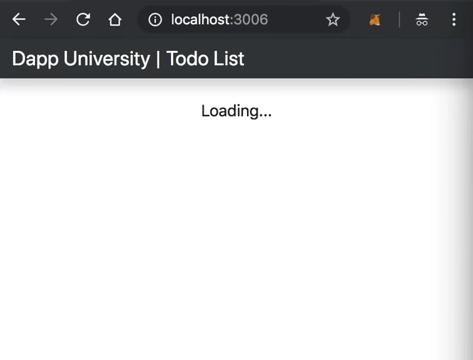
Now let's start the web server and ensure that the project will load in the browser.
$ npm run devYay! 🎉 You have successfully loaded the client side application. 😃 Notice that your application says "Loading...". That's because we're not logged in to the blockchain yet! In order to connect to the blockchain, we need to import one of the accounts from Ganache into Metamask. You can watch me set up Metamask in the video at 43:55.
Once you're connected with Metamask, you should see all of the contract and account data loaded.
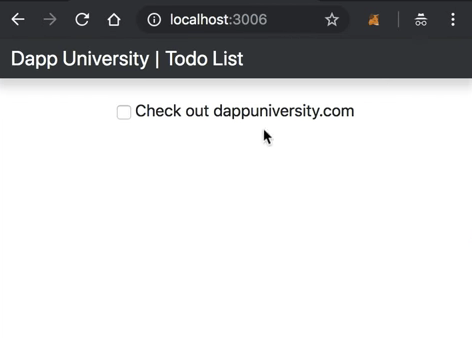
💥 Boom! There is your todo list! 😃
Testing
Now let's write a basic test to ensure that the todo list smart conract works properly. First, let me explain why testing is so important when you're developing smart contracts. We want to ensure that the contracts are bug free for a few reasons:
- All of the code on the Ethereum blockchain is immutable; it cannot change. If the contract contains any bugs, we must disable it and deploy a new copy. This new copy will not have the same state as the old contract, and it will have a different address.
- Deploying contracts costs gas because it creates a transaction and writes data to the blockchain. This costs Ether, and we want to minimize the amount of Ether we ever have to pay.
- If any of our contract functions that write to the blockchain contain bugs, the account who is calling this function could potentially waste Ether, and it might not behave the way they expect.
Let's create a test file like this:
$ test/TodoList.test.jsWe'll write all our tests in Javascript inside this file with the Mocha testing framework and the Chai assertion library. These come bundled with the Truffle framework. We'll write all these tests in Javascript to simulate client-side interaction with our smart contract, much like we did in the console. Here is all the code for the tests:
const TodoList = artifacts.require('./TodoList.sol')

contract('TodoList', (accounts) => {
  before(async () => {
    this.todoList = await TodoList.deployed()
  })

  it('deploys successfully', async () => {
    const address = await this.todoList.address
    assert.notEqual(address, 0x0)
    assert.notEqual(address, '')
    assert.notEqual(address, null)
    assert.notEqual(address, undefined)
  })

  it('lists tasks', async () => {
    const taskCount = await this.todoList.taskCount()
    const task = await this.todoList.tasks(taskCount)
    assert.equal(task.id.toNumber(), taskCount.toNumber())
    assert.equal(task.content, 'Check out dappuniversity.com')
    assert.equal(task.completed, false)
    assert.equal(taskCount.toNumber(), 1)
  })
})
Let me explain this code. First, we require the require the contract and assign it to a variable, like we did in the migration file. Next, we call the "contract" function, and write all our tests within the callback function. This callback function provides an "accounts" variable that represents all the accounts on our blockchain, provided by Ganache.
The first test checks that the contract was deployed to the blockchain properly by inspecting its address.
The next test checks that the smart contract lists task properly by checking the default task that we created in the initializer function.
Now let's run the tests from the command line like this:
$ truffle testYay, they pass! 🎉 If you got stuck you can follow along with me as I write these tests in the video for further explanation.
Create Tasks
The accompanying video footage for this portion of the tutorial begins at 1:05:07.
We've already created a function for creating tasks, but it is not complete just yet. That's because I want to trigger an event any time that new task is created. Solidity allows us to trigger arbitrary events which external consumers can subscribe to. It will allow us to listen for these events inside client side applications, etc... Let's create a TaskCreated() event and trigger it anytime a new task is created in the createTask() function like this:
pragma solidity ^0.5.0;

contract TodoList {

  // ...

  event TaskCreated(
    uint id,
    string content,
    bool completed
  );

  // ...

  function createTask(string memory _content) public {
    taskCount ++;
    tasks[taskCount] = Task(taskCount, _content, false);
    emit TaskCreated(taskCount, _content, false);
  }

}
Now let's create a test to ensure that this event is triggered any time a new task is created. We will inspect the transaction receipt when the new task is created. This will contain all of the log information that will contain the event data. We can inspect this data inside our test like this to ensure that the event was triggered properly:
it('creates tasks', async () => {
  const result = await this.todoList.createTask('A new task')
  const taskCount = await this.todoList.taskCount()
  assert.equal(taskCount, 2)
  const event = result.logs[0].args
  assert.equal(event.id.toNumber(), 2)
  assert.equal(event.content, 'A new task')
  assert.equal(event.completed, false)
})
Now let's run the test:
$ truffle testYay, they pass! 🎉 Now let's deploy a new copy of the smart contract to the blockchain since the code has changed:
$ truffle migrate --resetNow let's update the the client side code. We'll un-comment the form code in the index.html file first:
<form onSubmit="App.createTask(); return false;">
  <input id="newTask" type="text" class="form-control" placeholder="Add task..." required>
  <input type="submit" hidden="">
</form>
Now we'll add a createTask() function in the app.js file like this:
createTask: async () => {
  App.setLoading(true)
  const content = $('#newTask').val()
  await App.todoList.createTask(content)
  window.location.reload()
},
Now you should be able to add new tasks from the client side application! Notice, there is no "submit" button on the form. I left it off to simplify the user interface. You must hit the "enter" key on your keyboard to submit a task. Once you do, you'll see a Metamask confirmation pop up. You must sign this transaction in order to create the task.
Complete Tasks
The accompanying video footage for this portion of the tutorial begins at 1:16:40.
Now the last thing we'll do in this tutorial is "check off" the tasks in the todo list. Once we do, they will appear in the "completed" list, striked though. First, we'll update the smart contract. We'll add a TaskComplted() event, and trigger it inside a new toggleCompleted() function like this:
pragma solidity ^0.5.0;

contract TodoList {

  // ...

  event TaskCompleted(
    uint id,
    bool completed
  );

  // ...

  function toggleCompleted(uint _id) public {
    Task memory _task = tasks[_id];
    _task.completed = !_task.completed;
    tasks[_id] = _task;
    emit TaskCompleted(_id, _task.completed);
  }

}
Now we'll write a test like this:
it('toggles task completion', async () => {
  const result = await this.todoList.toggleCompleted(1)
  const task = await this.todoList.tasks(1)
  assert.equal(task.completed, true)
  const event = result.logs[0].args
  assert.equal(event.id.toNumber(), 1)
  assert.equal(event.completed, true)
})
Now let's run the test:
$ truffle testYay, it passes! 🎉 Now let's deploy a new copy of the smart contract to the blockchain since the code has changed:
$ truffle migrate --resetNow let's update the the client side code. First we'll un-comment the event listener inside the renderTasks() function:
$newTaskTemplate.find('input')
  .prop('name', taskId)
  .prop('checked', taskCompleted)
  .on('click', App.toggleCompleted)
Now we'll add a toggleCompleted() function in the app.js file like this:
toggleCompleted: async (e) => {
  App.setLoading(true)
  const taskId = e.target.name
  await App.todoList.toggleCompleted(taskId)
  window.location.reload()
},
Now, find a task in the client side application and click the checkbox. Once you sign this transaction, it will check off the task from the todo list!
Congratulations! 🎉 You have successfully built a full stack blockchain application powered by Ethereum smart contracts! You can download the full source code to this tutorial here, and watch the full video here.
Happy with this tutorial? Then you NEED to join my free training here where I'll show you how to build a real world blockchain app so that you can become a highly paid blockchain developer!