Solidity for Beginners · Smart Contract Development Crash Course
By Gregory McCubbin ·
Hey everybody, it’s Gregory from Dapp University!
Today I'm going to show you how to get started programming with the Solidity so that you can become a blockchain developer. I'll show you how to write your first Ethereum smart contracts with Solidity as a beginner! You don't have know anything about the language to get started with this tutorial. We'll even do all the programming inside your web browser so you won't have install any development tools or anything like that.
Table of Contents
Here is a summary of what we’ll cover:
- Intro To Solidity
- Data Types and Data Structures
- Function Visibility, Modifiers & Time
- Sending Ether & Events
- Smart Contract Interaction & Inheritance
#1 · Intro To Solidity
Watch the video above to follow along with this step-by-step introduction!
Solidity is the main programming language for writing smart contracts for the Ethereum blockchain. It is a contract-oriented language, which means that smart contracts are responsible for storing all of the programming logic that transacts with the blockchain. It's a high-level programming language that looks a lot like JavaScript, Python, and C++. It's designed to run on the Ethereum Virtual Machine (EVM), which is hosted on Ethereum Nodes that are connected to the blockchain. It is statically typed, and supports inheritance, libraries, and more! In short, it has all the capability that you need in order build industrial strength blockchain applications.
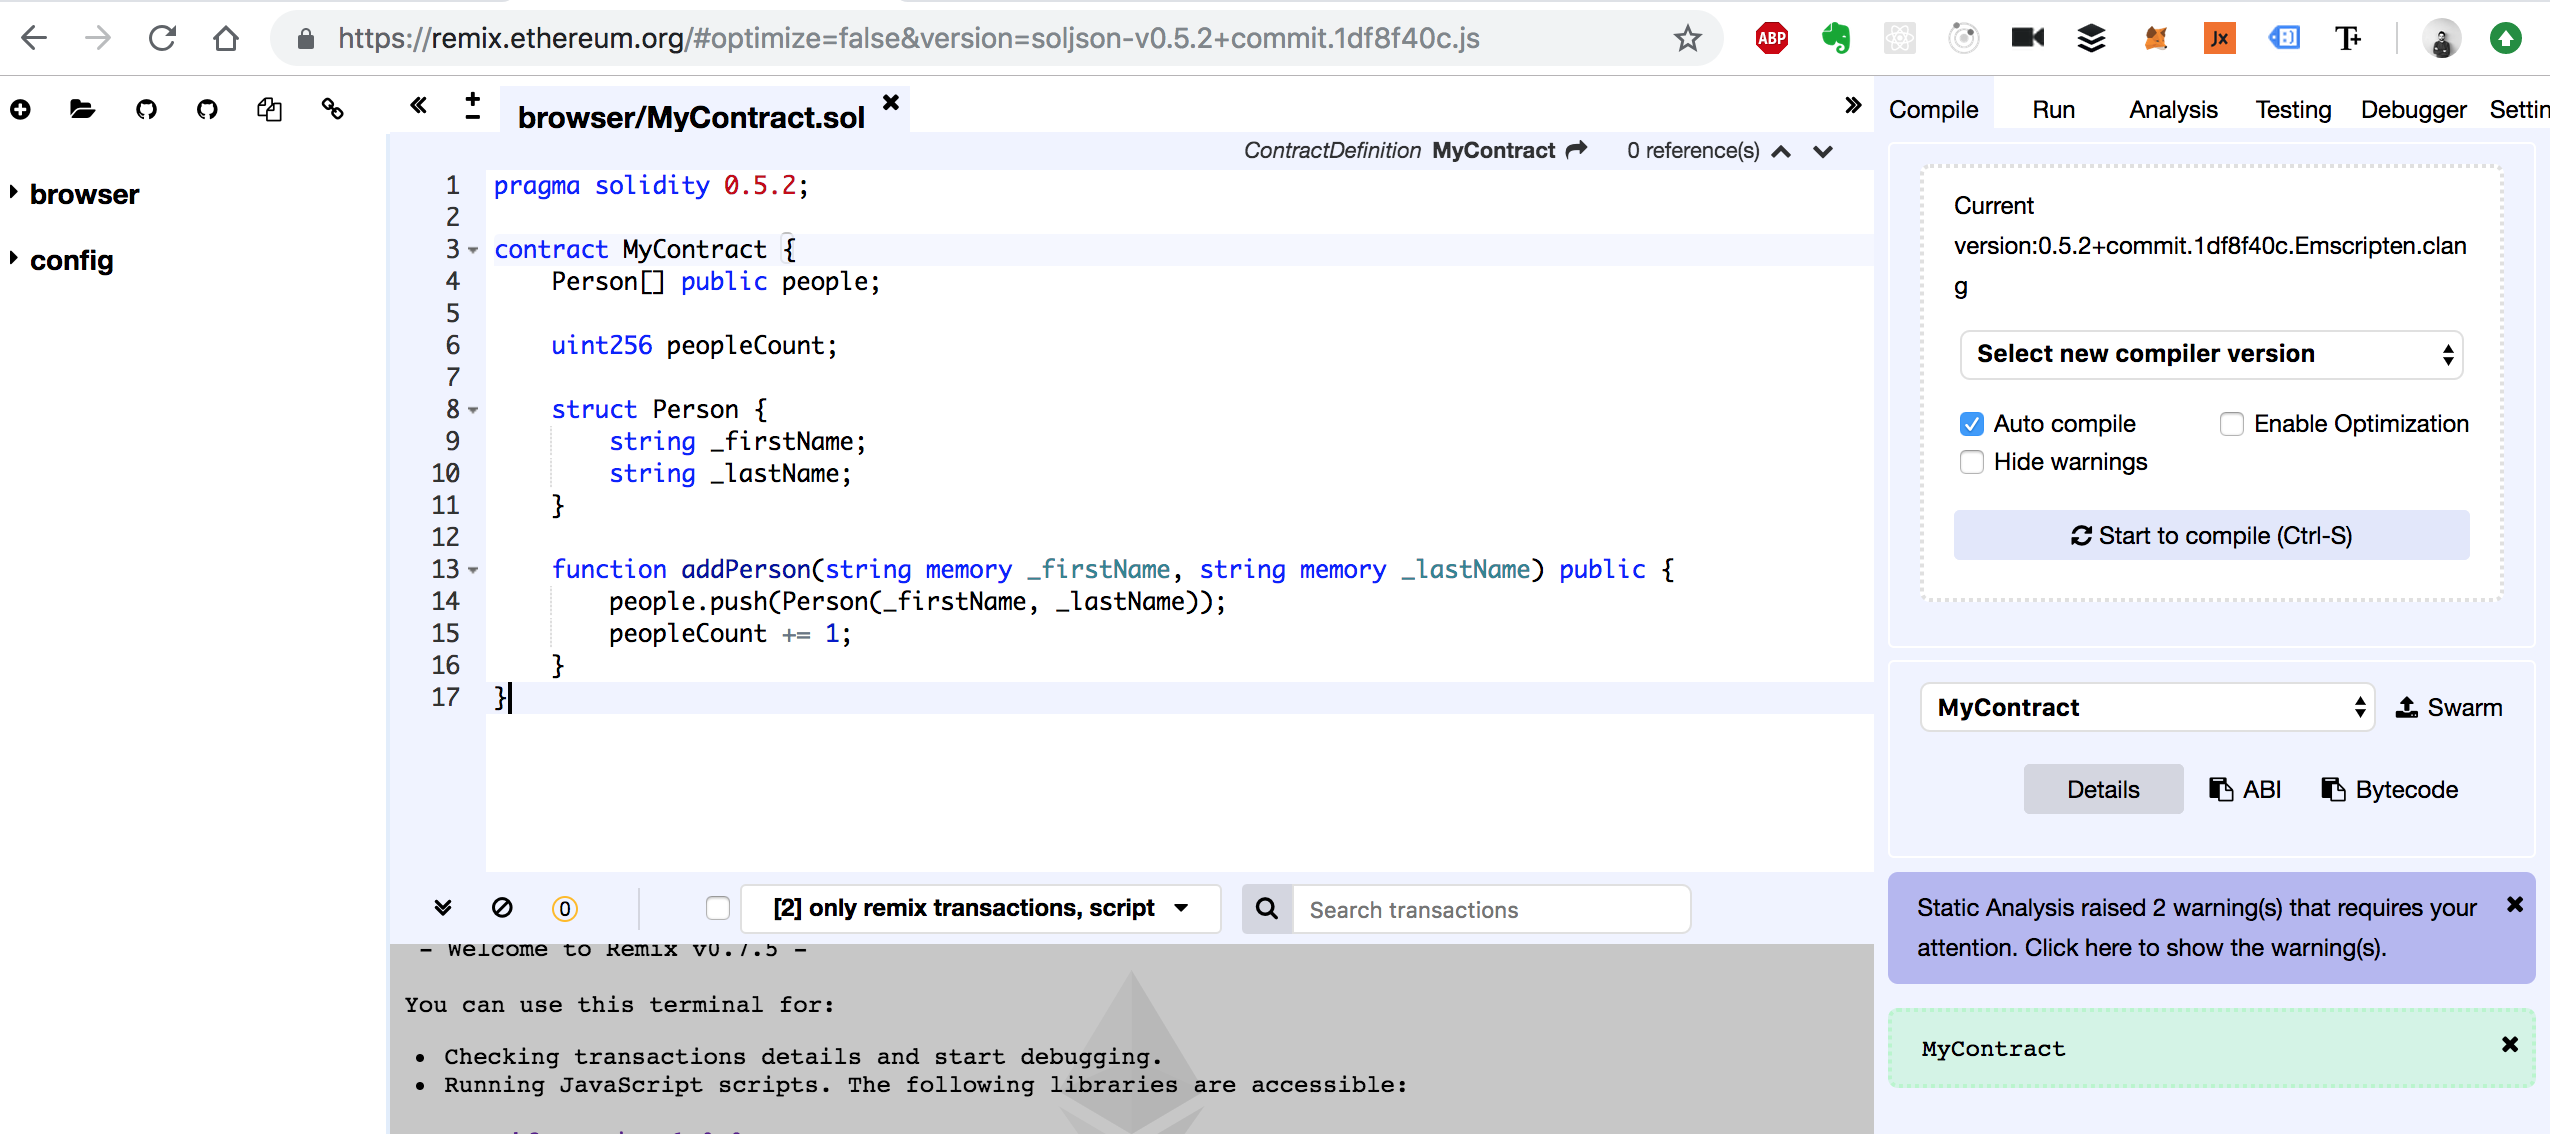
We're going to use Remix to write all of the code in this tutorial. Remix is a browser-based IDE that allows you to write, compile, deploy smart contracts! It has a lot of nice features like persistent file storage! We'll use Remix so that we don't have to download any developer tools or install anything to get started. Head on over to Remix in a new tab in order to follow along with this tutorial.
Let's start by creating a new file to write some Solidity code. You can do this in the file browser on the left hand side of the screen.

Let's create a new file named MyContract.sol. On the first line of this file, we'll declare the version of the solidity programming language we want to use:
pragma solidity ^0.4.24;Now we can declare the smart contract like this:
pragma solidity ^0.4.24;
contract MyContract {
    // ...
}
Let me explain a few things before we continue. A smart contract is a piece of code that gets executed on the Ethereum blockchain. It functions somewhat like an API microservice on the web that is publicly accessible to everyone. All of the code of the smart contract is visible to the public, and we can allow anyone connected to the network to call functions on the smart contract.
Now let's continue building out this smart contract. First, we'll program a simple "storage" smart contract that will be able to:
- Store a value
- Retrieve this value
We'll start by creating a way to store a string value in the smart contract like this. We'll do that with a variable called value. Solidity is a statically typed language, so we must first specify the data type when declaring the variable like this:
pragma solidity ^0.4.24;
contract MyContract {
    string value;

}
This variable is called a "state variable" because it actually persists data to the blockchain. Anytime that we set this value, the string will be saved to the blockchain! It will get written to storage, not memory. This variable also has special scope, as it is accessible to the entire smart contract unlike a local variable which is only accessible inside of functions, and will not persist after the function has been called. We'll see more examples of this as we continue along with this tutorial.
Now let's create a function to read this value from storage. We'll start by declaring a function called get() with the function keyword like this:
function get() {
    // ...
}
Now we'll return the value from the state variable with the return keyword like this:
function get() {
    return value;
}
Now we'll set the "visibility" of this function to public so that anyone connected to the blockchain can call it (not just from within the smart contract code itself):
function get() public view {
    return value;
}
Finally, we'll specify the return value string for the function:
function get() public view returns(string) {
    return value;
}
Awesome! Now we have a way to read this value from the smart contract. I'll show you how to do this after we compile it momentarily. Before we get there, let's create a way to set this value from outside the smart contract. We'll create a set function like this:
function set(string _value) public {
    // ...
}
We simply created a function that accepts a _value argument of string type. This function is also publicly visible so that anyone connected to the blockchain can call it. Now let's actually update the smart contract value like this:
function set(string _value) public {
    value = _value;
}
Here we simply assigned the passed in _value and assigned it to the value state variable. Notice that _value, prepended by an underscore is simply a local variable. This is a common convention when writing Solidity code, as well as other languages.
Now let's set a default value for the value state variable. We'll do that inside the smart contract constructor function like this:
constructor() public {
    value = "myValue";
}
We first declare the constructor function with the constructor keyword. This function is run only once, whenever the smart contract is deployed. It also must have the public visibility.
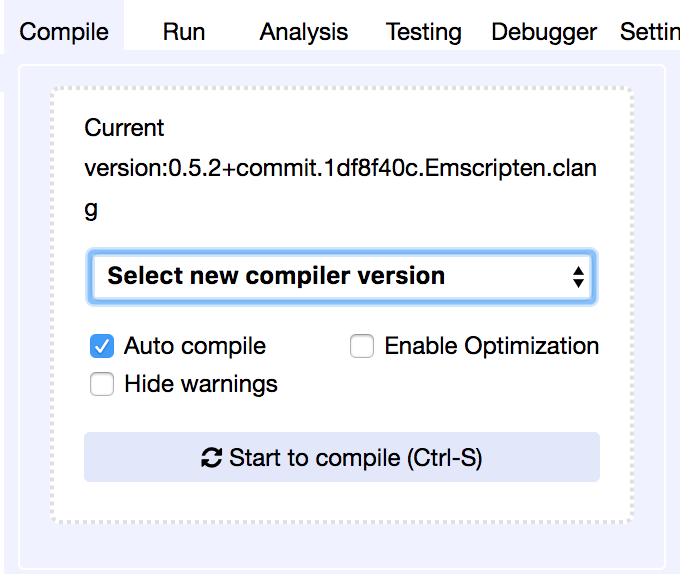
Now that's the complete source code! Let's see how we can compile and deploy this smart contract. First we'll set the compiler version in the right hand side of your browser. We'll choose version 0.4.25 to compile this code.
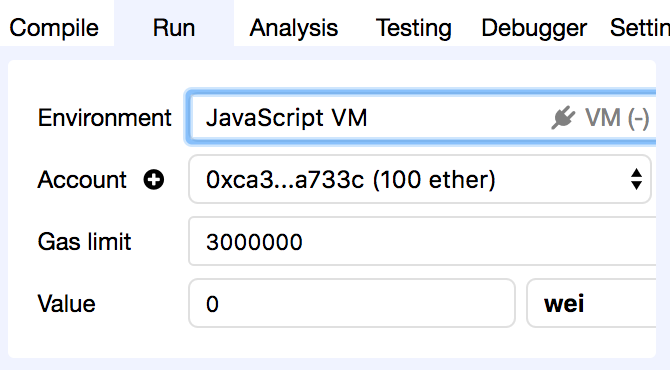
Now, let's choose the environment. I'll select the JavaScript virtual machine, which will give us a simulated blockchain inside our browser.
Now we can easily deploy this with a single click of a button!
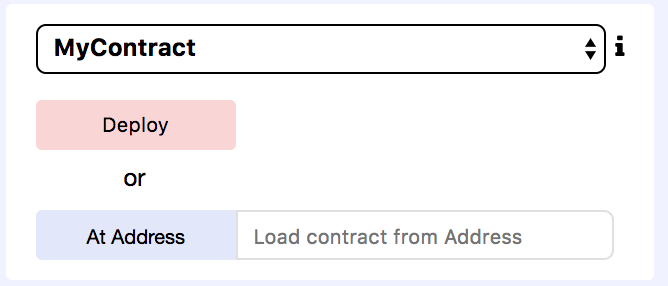
Awesome! You've just deployed the smart contract. You can interact with the smart contract by calling its functions below, with the form that was generated based upon the smart contract's interface.

First, let's read the value. Let's click the get() function. You should see the default "myValue" that was set in the constructor.
Now let's update the value with the set() function. Add a new value inside the form field, just make sure that you wrap it in quotation marks like this: "New Value". Now run it! Now read the value again. It should changed to "New Value"!
You might have noticed this transaction window below the text editor. This is a complete list of all the transactions on this virtual blockchain. Remember, the Etherum blockchain is made up of bundles of records called "blocks" which are "chained together" to make up the public ledger. The basic units of all these blocks are transactions. You're seeing them listed here below. You can click the "down" arrow to see all details of the receipt. They look like this:

Alright that's it! 🎉 You've just written your first Ethereum smart contract with the Solidity programming language! Let's move on to the next section where we'll build off of this code and learn more about the language!
#2 · Data Types and Data Structures
Before we move on, let's update the code in our smart contract to be compatible with the latest version of Solidity at the time of writing this article. We can modify the first line in the smart contract code like this:
pragma solidity ^0.5.1;Doing this will help us learn best practices for the current version of Solidity moving forward! Now let's address the warnings for the new version of solidity. First, modify the get() function to look like this:
function get() public view returns(string memory) {
    return value;
}
Note the memory distinction. We'll do the same for the set() function:
function set(string memory _value) public {
    value = _value;
}
Great! Now that we're up to date, let's talk about basic data types and data structures so that you can start implementing them into your own Ethereum smart contracts. We'll do this by first creating state variables of varying data types. First, let's look at some nice features of state variables provided by Solidity. Currently, we simply declare the value state variable, and the use the get() function to set it's value. There is a shortcut in solidity that makes this much easier. We can simply do this:
string public value;This sets the visibility of the state variable to public, which means that anyone outside of the smart contract can read its value. When we do this, Solidity provides a value() function for free! Now we no longer need the get() function! We can also assign a default value to the state variable like this:
string public value = "myValue";Now we no longer need to set this in the constructor function either! That really reduces the amount of code we have to write. We can also set this value as a constant that will never change like this:
string public constant value = "myValue";Now that we've done this, we must remove the set() function because Solidity will not allow us to update this value since it is a constant.
That's an overview of the shortcuts Solidity provides for state variables. Now let's create some more state variables to examine some different data types available in Solidity. Just like the string state variable, we always declare the data type, then the visibility before declaring the variable name. First, we can create a boolean state variable like this:
bool public myBool = true;This can be either true or false.Now we can create an unsigned integer like this:
Now we can create an integer like this:
int public myInt = 1;Integers can be positive or negative, i.e., signed. If you don't want a number to be negative, you can create an unsigned integer like this:
uint public myUint = 1;We can specify the number of bits for the number. The above example defaults to 256 bits. We can be explicit like this:
uint256 public myUint256 = 9999;We can also restrict the value to 8 bits, like this:
uint8 public myUint8 = 8;
Enums
Now let's go over some basic data structures in solidity. First, let's look at the Enum data structure, which are a way of keeping track of enumerated lists in Solidity. We can check against this list whenever you're writing smart contracts. Let's create an enum in the smart contract like this:
enum State { Waiting, Ready, Active }Just as an example, this will help us keep track of the active state of the smart contract by providing Waiting, Ready, and Active options. We can check the current state of the smart contract like this:
State public state;Now, we can set the default state in the constructor:
constructor() public {
    state = State.Waiting;
}
Now, we can set the default state in the constructor:
constructor() public {
    state = State.Waiting;
}
We can update the current state to active like this:
function activate() public {
    state = State.Active;
}
And finally, we can check against the enum list to see if the state is currently active like this:
function isActive() public view returns(bool) {
    return state == State.Active;
}
Now the final smart contract code should look like this:
pragma solidity 0.5.1;

contract MyContract {
    enum State { Waiting, Ready, Active }
    State public state;

    constructor() public {
        state = State.Waiting;
    }

    function activate() public {
        state = State.Active;
    }

    function isActive() public view returns(bool) {
        return state == State.Active;
    }
}
That's an example of how you can use enums inside your smart contracts to track state! Just as another example, this is very useful for tracking the state of a crowdsale ICO smart contract that is open or closed. You can check that out in my other tutorial where I show you how to build a real world ICO.
Structs
Solidity allows you to define your own data types with Structs. You can basically model any kind of data you want with arbitrary attributes of varying data types. Let's look at how this works by creating a people struct:
struct Person {
    string _firstName;
    string _lastName;
}
We've modeled a person here that has a _firstName and _lastName. Notice that we're able to specify any data type that we want! We've used strings for both attributes here. We could add up to 17 different attributes here with any data type. For now, let's keep it simple and only use two attributes to model the person.
Arrays
Now we need a place to store this person struct. Let's use an array for this! We can declare people array like this:
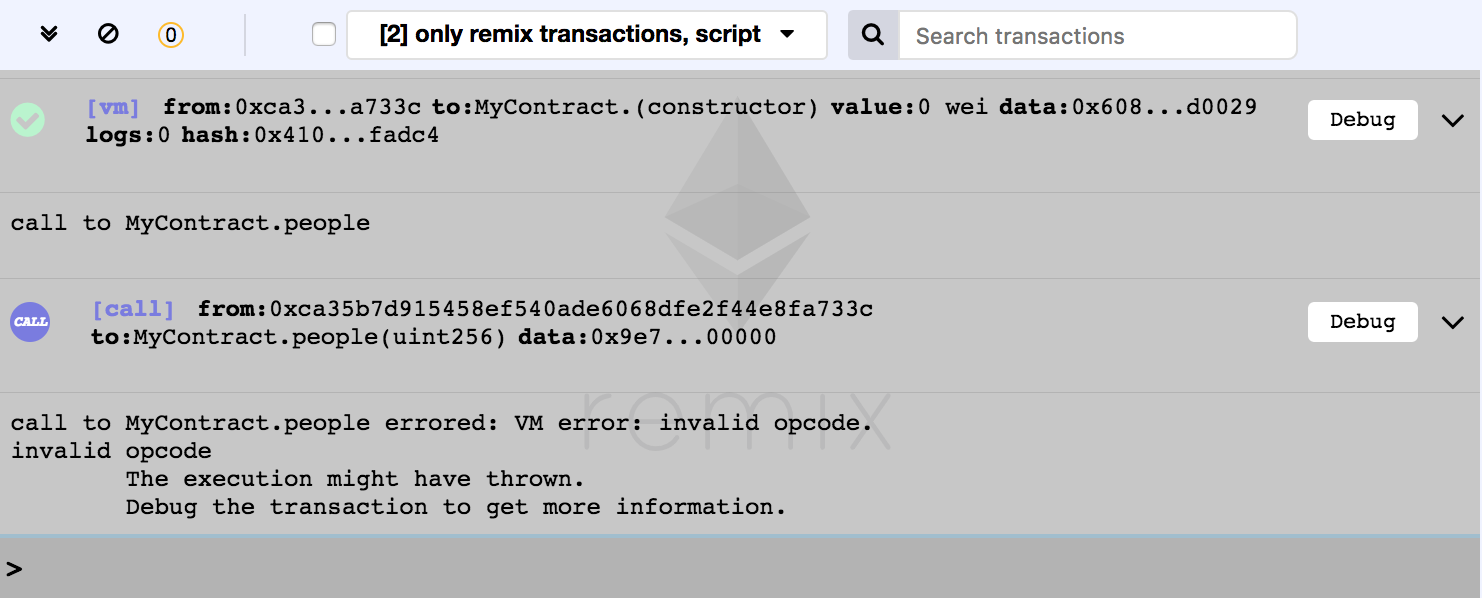
Person[] public people;Notice we declare the type within the array, i.e., Person. We also set the visibility to public and assigned it to a state variable called people. This will provide us with a function that will allow us to access the people inside this array. I should mention though, that calling the people() function outside the smart contract will not return the entire array. Instead, the people() function will accept an index argument that will allow us to reference the person inside the array based upon that index, which is zero-based. For example, we can access the first person in the people array like this:
people(0)Now let's create a way to add a person to this array. We'll create an addPerson() function like this:
function addPerson(string memory _firstName, string memory _lastName) public {
    people.push(Person(_firstName, _lastName));
    peopleCount += 1;
}
This function will accept the arguments for the person struct attributes, then instantiate a new person and add it to the people array with the push function. It also increments the peopleCount state variable by 1. We can implement that state variable in the smart contract like this:
uint256 public peopleCount;We'll use this value as a counter cache. Remember how I said that you can't return the entire people array with the people() function? Knowing how many people are inside this array will help us know how many times we must call the people() function to get each person.
Now the completed smart contract code should look like this:
pragma solidity 0.5.1;

contract MyContract {
    Person[] public people;

    uint256 public peopleCount;

    struct Person {
        string _firstName;
        string _lastName;
    }

    function addPerson(string memory _firstName, string memory _lastName) public {
        people.push(Person(_firstName, _lastName));
        peopleCount += 1;
    }
}
Mappings
Solidity provides a data structure called a mapping which allows us to store key-value pairs. This structure acts much like an associative array or a hash table in other functions. We can declare a mapping in the smart contact like this:
mapping(uint => Person) public people;
This will be a mapping where we store person structs. It will replace the people array we used in the previous example. The key will be an unsigned integer, and the value will be a person struct. We'll treat the key like a database id. We can update the person struct to keep track of that id like this:
struct Person { uint _id; string _firstName; string _lastName; }
Now we can modify the addPerson() function to update the people mapping like this:
function addPerson(string memory _firstName, string memory _lastName) public {
    peopleCount += 1;
    people[peopleCount] = Person(peopleCount, _firstName, _lastName);
}
This uses the peopleCount counter cache to create an id for the person. Then it instantiates a new person struct with the id and the passed in attributes. It then adds this to the people mapping. The completed smart contract code should look like this:
pragma solidity 0.5.1;

contract MyContract {
    uint256 peopleCount = 0;

    mapping(uint => Person) public people;

    struct Person {
        uint _id;
        string _firstName;
        string _lastName;
    }

    function addPerson(string memory _firstName, string memory _lastName) public {
        peopleCount += 1;
        people[peopleCount] = Person(peopleCount, _firstName, _lastName);
    }
}
Hooray! Now you've seen an overview of the basic data types and data structures in Solidity.
#3 · Function Visibility, Modifiers & Time
Now let's talk about function visibility. In the last sections, we used the public function visibility several times so that the smart contract functions can be called outside the smart contract by accounts connected to the network. What if we wanted to create functions that are only used inside the smart contract? We can do this with the internal visibility. Let's move accomplish this by the business logic that increments the peopleCount to its own internal function like this:
function incrementCount() internal {
    peopleCount += 1;
}
This function will only be accessible inside the smart contract, not by the public interface for other accounts. Now we can call this function inside the addPerson() function like this:
function addPerson(string memory _firstName, string memory _lastName) public {
    incrementCount()
    people[peopleCount] = Person(peopleCount, _firstName, _lastName);
}
Now that's an example of other types of function visibly. Let's talk about function modifiers. These will allow us to add special behavior to our functions, like add permissions. Let's create a modifier that only allows an admin or "owner" to call the addPerson() function, and restrict everyone else from calling this function.
First, we'll create a way to store the owner of this smart contract. We can do that with a state variable like this:
address owner;Now let's create a modifier that checks if the person calling the function is the owner:
modifier onlyOwner() {
    require(msg.sender == owner);
    _;
}
Let me explain this code:
- First, we declare the modifier with the
modifierkeyword, followed by the modifier nameonlyOwner. - Next, we access the current account that's calling the function with
msg.sender. Solidity provides this value inside themsgglobal variable, just like the current ether of the transaction likemsg.senderwhich we saw in previous sections. - Next, we use
require()to check that the account calling the function is the owner. If the result of the expression passed intorequire()evaluates totrue, then code resumes execution. If not, it throws an error. In this case, if the account calling the function is not the owner, then Solidity will throw an error.
Now we can set the owner inside the smart contract as the account that deploys the smart contract like this:
constructor() public {
    owner = msg.sender;
}
Now we can add the modifier to the addPerson() function so that only the owner can call it. While I'm here, I'll show you how I format my Solidity code once the functions start getting big, with lots of arguments, modifiers, visibility, etc...
function addPerson(
    string memory _firstName,
    string memory _lastName
)
    public
    onlyOwner
{
    incrementCount()
    people[peopleCount] = Person(peopleCount, _firstName, _lastName);
}
Now try to run your code to see if only the owner can call the function successfully without any errors! At th is point your the complete smart contract code should look like this:
pragma solidity 0.5.1;

contract MyContract {
    uint256 public peopleCount = 0;
    mapping(uint => Person) public people;

    address owner;

    modifier onlyOwner() {
        require(msg.sender == owner);
        _;
    }

    struct Person {
        uint _id;
        string _firstName;
        string _lastName;
    }

    constructor() public {
        owner = msg.sender;
    }

    function addPerson(
        string memory _firstName,
        string memory _lastName
    )
        public
        onlyOwner
    {
        incrementCount()
        people[peopleCount] = Person(peopleCount, _firstName, _lastName);
    }

    function incrementCount() internal {
        peopleCount += 1;
    }
}
Now let's talk about time. We can create a new modifier that uses time to illustrate a use case for time in Solidity. We'll create a new modifier called onlyWhileOpen that will check that the current time on the blockchain is past a time that we specify. This is a common practice when creating ICO crowdsale smart contracts that have an "opening time". Often times, these smart contracts will reject investor contributions that are made before the crowdsale has started. We can model similar behavior by restricting access to the addPerson() function until after the opening time has passed. First let's create a state variable to store the opening time:
uint256 startTime;We can store the startTime with this state variable in seconds, as that's how we express timestamps in Solidity. In fact, the time stamps are expressed in unix time which is the number of seconds that have passed since Thursday, 1 January 1970. You can read more about this time convention on Wikipedia.
Now I'll set the start time in the constructor like this:
constructor() public {
    startTime = 1544668513;
}
By the time you read this article, that timestamp will have passed. You can use this website to generate a unix timestamp in the future for your own purposes! Now let's create a modifier to check that the start time has passed like this:
modifier onlyWhileOpen() {
    require(block.timestamp >= startTime);
    _;
}
Let me explain this code:
- First, we declare the modifier, just like we did in the last example.
- Next, we require the specific condition, just like the last example.
- Now, we compare the start time to "now", by checking the current block's timestamp with
block.timestamp. This is how we get "now" in Solidity!
Now we can add the modifier to the addPerson() function. Try to run this code and see if you can restrict the access to some time in the future! Again, you can use this website to generate a timestamp in the future. Make sure you update this value in the constructor function! The complete smart contract code should look like this:
pragma solidity 0.5.1;

contract MyContract {
    uint256 public peopleCount = 0;
    mapping(uint => Person) public people;

    uint256 startTime;

    modifier onlyWhileOpen() {
        require(block.timestamp >= startTime);
        _;
    }

    struct Person {
        uint _id;
        string _firstName;
        string _lastName;
    }

    constructor() public {
        startTime = 1544668513; // Update this value
    }

    function addPerson(
        string memory _firstName,
        string memory _lastName
    )
        public
        onlyWhileOpen
    {
        people[peopleCount] = Person(peopleCount, _firstName, _lastName);
    }

    function incrementCount() internal {
        peopleCount += 1;
    }
}
#4 · Sending Ether & Events
Now let's write a function that accepts Ether. To demonstrate this, I'll create an ico-like contract with a buyToken() function. This will allow an account to send ether to pay for tokens with Ether. The smart contract will be responsible for issuing the tokens, tracking the balance of the account, and also transferring the Ether funds to another wallet address. Again, this is a pseudo-ico example. If you'd like to see a complete ICO tutorial, you can check out my other tutorials Code Your Own Cryptocurrency On Ethereum and Real World ICO.
First we'll create a mapping to track the token balances like this:
mapping(address => uint256) public balances;Now I'll create the buyToken() function that will increment the balance like this:
function buyToken() public {
    balances[msg.sender] += 1;
}
Now I'll declare a wallet where the ether funds will be sent whenever an account buys tokens:
address wallet;Now we can transfer funds to the wallet whenever the buyToken() function is called like this:
function buyToken() public payable {
    balances[msg.sender] += 1;
    wallet.transfer(msg.value);
}
Now let me explain this code:
- We can transfer ether directly to the wallet by calling
wallet.transfer() - We can get the value of the Ether sent in by function caller with
msg.value, just likemsg.sender - We also must use the
payablemodifier so that accounts can send Ether when calling the function.
Likewise, to update to Solidity 0.5.1, we must explicitly declare the wallet payable as well:
address payable wallet;Now let's set the wallet address inside the constructor function of the contract (we'll use the payable modifier here, too):
constructor(address payable _wallet) public {
    wallet = _wallet;
}
Awesome! Now watch the video above as I demonstrate how to send Ether with this function inside of Remix. You complete smart contract code should look like this up to this point:
contract MyContract {
    mapping(address => uint256) public balances;
    address payable wallet;

    constructor(address payable _wallet) public {
        wallet = _wallet;
    }

    function buyToken() public payable {
        balances[msg.sender] += 1;
        wallet.transfer(msg.value);
    }
}
Now I'll show you how to create a default or "fallback" function inside Solidity. This is a function that will get called anytime an account sends Ether to a smart contract. This is a very common pattern for ICO smart contracts, where you simply send Ether to a smart contract and it executes a function. That's exactly what we'll do here. We'll declare a fallback function that wraps the buyTokens() function. It will purchase tokens any time an account sends Ether to the smart contract. We can do that like this:
function() external payable {
    buyToken();
}
Awesome! Now watch the video above as I demonstrate how to send Ether to the smart contract inside Remix.
Now let's talk about Events. Events are a way of dealing with the asynchronous nature of the blockchain. We can declare events inside smart contracts that can be subscribed to by external consumers. These consumers will be able to listen for these events to know that something happened inside the smart contract. We'll declare a Purchase event at the top of the smart contract like this:
event Purchase(
    address _buyer,
    uint256 _amount
);
This event will log the buyer and the token amount. We'll be able to trigger this event inside the buyToken() function like this:
function buyToken() public payable {
    balances[msg.sender] += 1;
    wallet.transfer(msg.value);
    emit Purchase(msg.sender, 1);
}
This event will allow us to know any time a token is purchased inside this smart contract. But what if we only wanted to listen for events that were relevant to our account? Good news! Solidity allows us to subscribe to filter events by indexed values. We can index the _buyer inside the event like this:
event Purchase(
    address indexed _buyer,
    uint256 _amount
);
Awesome! Now you know how to work with events inside Solidity. At this point your complete smart contract code should look like this:
contract MyContract {
    mapping(address => uint256) public balances

    event Purchase(
        address indexed _buyer,
        uint256 _amount
    );

    constructor(address payable _wallet) public {
        wallet = _wallet;
    }

    function() external payable {
        buyToken();
    }

    function buyToken() public payable {
        balances[msg.sender] += 1;
        wallet.transfer(msg.value);
        emit Purchase(msg.sender, 1);
    }
}
You can watch the video above to learn how to inspect transaction receipts to see the values returned by events.
Lastly, I'll say a few common use cases for using events in Solidity. First is to listen for them directly, just as I mentioned before. It's common to call a smart contract function, and then wait for an event to trigger to know that the function call completed. Secondly, you can get the entire event stream from a smart contract, i.e., every event that was triggered by it. It's a really nice way to get the entire history of a function call inside Solidity. I actually show you how to do this in my series on Web3.js! You can check that out for more info.
#5 · Smart Contract Interaction & Inheritance
Now I'll show you how to work with multiple smart contracts in solidity. First, I'll show you how to call smart contract functions from within another smart contract. Then, I'll show you how to inherit behavior from a parent smart contract within a child smart contract.
First I'll refactor the code from the previous example to create a token smart contract that's separate from MyContract code. This will be a pseudo ERC20 token, which will not contain all the functionality of a real ERC-20 smart contract. You can check out my other tutorial that shows you how to do that. For now, I'll create the token contract like this:
contract ERC20Token {
    string name;
    mapping(address => uint256) public balances;

    function mint() public {
        balances[msg.sender] += 1;
    }
}
This moves the mint() function, name, and balances mapping to the token contract since that's where these responsibilities should lie. Now we can mint tokens from MyContract using the ERC20Token contract. In order to do this, we need to a few things: the address of the token, and the smart contract code in order to call its mint() function. First I'll store the token address in a state variable like this:
contract MyContract {
    address public token;
    //...
}
Now we can set the value for the token address inside the constructor like this:
constructor(address payable _wallet, ERC20Token _token) public {
    wallet = _wallet;
    token = _token;
}
Now that we have the address available, we can access the smart contract code inside of the buyToken() function like this, and call the mint() function on it like this:
function buyToken() public payable {
    ERC20Token _token = ERC20Token(address(token));
    _token.mint();
    wallet.transfer(msg.value);
}
I want to draw your attention to something before we continue. If you were to call the buyToken() function from your personal account right now, you would not mint any tokens for yourself. Why is that!? Let's revisit the mint() function as it is now:
function mint() public {
    balances[msg.sender] += 1;
}
The reason it will not mint tokens for your account is because msg.sender is actually referencing the address of MyContract, which is calling the function from inside its buyToken()function! If we want to mint tokens for our own account, we must use tx.origin to reference the account that originated the transaction on the blockchain like this:
function mint() public {
    balances[tx.origin] += 1;
}
There you go! Now you can mint tokens from another smart contract! Watch the video to see how to run this demonstration inside Remix. You will need to deploy the token smart contract first, obtain its address, and then include it as an argument whenever you deploy the second smart contract. At this point your complete smart contract code should look like this:
pragma solidity 0.5.1;

contract ERC20Token {
    string name;
    mapping(address => uint256) public balances;

    function mint() public {
        balances[tx.origin] += 1;
    }
}

contract MyContract {
    address public token;

    address payable wallet;

    constructor(address payable _wallet, address _token) public {
        wallet = _wallet;
        token = _token;
    }

    function buyToken() public payable {
        ERC20Token _token = ERC20Token(address(token));
        _token.mint();
        wallet.transfer(msg.value);
    }
}
Now I'll show you other ways to reference the token smart contract. We can use a one-lie expression like this:
function buyToken() public payable {
    ERC20Token(address(token)).mint();
    wallet.transfer(msg.value);
}
We can also refactor the code to store the token in a state variable like this:
contract MyContract {
    ERC20Token public token;
    //...
}
Then, we can simply call the mint function like this:
function buyToken() public payable {
    token.mint();
    wallet.transfer(msg.value);
}
Now let's talk about inheritance. Solidity allows you to create smart contracts that inherit from one another. Let's create a new pseudo token called MyToken that inherits from our original token smart contract. We'll use inheritance to give it a unique name, symbol, and mint function. We can inherit from the smart contract like this:
contract MyToken is ERC20Token {
    // ...

}
Now we can keep track of the token name in the parent smart contract like this:
pragma solidity 0.5.1;

contract ERC20Token {
    string public name;
    mapping(address => uint256) public balances;

    constructor(string memory _name) public {
        name = _name;
    }

    function mint() public {
        balances[tx.origin] ++;
    }
}
We can override the name of the parent token inside the constructor of our child token. While we're here, we'll also create a symbol for the child token and set it in the constructor. I'll show you how to override the parent token contract constructor, while assigning the new values like this:
contract MyToken is ERC20Token {
    string public symbol;

    constructor(
        string memory _name,
        string memory _symbol
    )
        ERC20Token(_name)
    public {
        symbol = _symbol;
    }
}
Awesome! Now we have customized MyToken. Now let's update the mint() function to override the functionality of the parent token. First, let's create a way to store the address of all the token owners. We'll also set the count of all the owners like this:
contract MyToken is ERC20Token {
    address[] public owners;
    uint256 public ownerCount;
    //...
}
Now let's update these values inside our own mint() function while preserving the behavior of the parent token smart contract. We can do that with the super keyword like this:
function mint() public {
    super.mint();
    ownerCount ++;
    owners.push(msg.sender);
}
Awesome! Now we've created our own custom token that inherits from the parent token. Your full smart contract code should look like this:
pragma solidity 0.5.1;

contract ERC20Token {
    string public name;
    mapping(address => uint256) public balances;

    constructor(string memory _name) public {
        name = _name;
    }

    function mint() public {
        balances[tx.origin] ++;
    }
}

contract MyToken is ERC20Token {
    string public symbol;
    address[] public owners;
    uint256 public ownerCount;

    constructor(
        string memory _name,
        string memory _symbol
    )
        ERC20Token(_name)
    public {
        symbol = _symbol;
    }

    function mint() public {
        super.mint();
        ownerCount ++;
        owners.push(msg.sender);
    }

}
Yay!!! 🎉 That wraps up the step-by-step article for now. Be sure to subscribe to my youtube channel because I plan to release more videos in this series so that you can continue to learn Solidity! Also be sure to SIGN UP FOR MY EMAIL LIST to learn about critical updates, including the release of new articles and Solidity videos. 😀
Happy with this tutorial? Then you NEED to join my free training here where I'll show you how to build a real world blockchain app so that you can become a highly paid blockchain developer!