The Best Way To Learn Blockchain Programming
By Gregory McCubbin ·
Hey everybody, it’s Gregory from Dapp University!
Today I want to show you the best way to learn blockchain programming.
Here is a summary of the ideas we’ll cover:
- How to Learn Blockchain Programming
- What is Web3.js?
- How does a blockchain application work?
- How do accounts work?
- What is Gas?
- What is Ether?
- What is Proof of Work?
- How Transactions work
How to Learn Blockchain Programming
Trying to learn blockchain programming can feel very overwhelming! You will surely come across many new concepts, terms, programming languages, and developer tools. It can feel like you are stepping into a different world entirely. In many ways, you are! That’s because building blockchain technology is a fundamental paradigm shift from building traditional web technology. There is a reason that the blockchain revolution is often referred to as the arrival of Web 3.0. While some aspects of Web 2.0 are here to stay, others are replaced by new ways of solving problems that old ways could not. There is a steep learning curve to overcome in order to understand the blockchain, and how to build applications for it.
How can you overcome this learning curve faster? How can you make learning blockchain programming easier?
The best way to learn blockchain programming is to find a simple programming tasks that introduce you to the new way of doing things and force you to learn all of the concepts that enable you to perform the tasks and explain why the tasks work. That’s the exact approach I’ll take in this article because it's the most efficient way to learn any new skill: by doing the skill itself. I call this a “task-oriented” approach to learning. When you focus on tasks that you don’t know how to complete, you’re forced to gain the skills you need to complete the task, and all of the supporting knowledge that enables you to perform that skill. Much of this supporting knowledge you gain this way is conceptual knowledge. All of this conceptual knowledge will give you the bigger picture about what you’re trying to learn, i.e, blockchain programming! Once you have the conceptual knowledge, you’ll also have the skill. This incredibly efficient because you’re learning skills and concepts *at the same time*.
This task-oriented approach starts with identifying a question that you want to know the answer to, then identifying the task that will give you the answer. You break this task down into skills, and then acquire the supporting knowledge that will enable you to perform these skills. These steps look like this:
- Identify the question you want to know the answer to
- Identify a task that will answer the question
- Identify the skills that teach you how to complete the task
- Identify the supporting knowledge you need in order to complete the skill
This looks like a “round trip” that can be visualized like this:

Let’s use an example to see how this approach works. Let’s start with the question “how does a blockchain application work”? What task will answer this question for you? The answer is to build a blockchain application! You then must identify the skills in order to complete this task, like learning a new programming language. You also must identify all supporting knowledge like what is happening when the code is executed. All of this supporting knowledge will teach you something about how the blockchain works and how the application works.
In the context of blockchain programming, the "round trip" looks like this:

When applying this method, big tasks must be broken down into smaller subtasks. For example, building a blockchain application is to big of a task because it produces an overwhelming number of skills that you must learn in order to complete it! The best way of applying this method is to find small tasks that support a larger purpose and accomplish bigger tasks. It must be treated like an iterative process. If the task is too big, it must be broken down into subtasks, and you can perform the task-oriented learning process on each subtask. Once you have completed this process, you’ll possess all the skills and knowledge required to complete the main task of building a blockchain application in order to answer the original question “how do I build a blockchain application”?
While this method is the most efficient way to learn, it doesn’t work well when you get stuck on any of the steps in the process. For example, what if you can’t identify the skills that teach you about the task? What if you can’t identify the supporting knowledge you need in order to complete the tasks? I admit, this can be very hard. I can identify with this, as I learned blockchain programming on my own without many good resources available. I had to identify all of the questions, tasks, skills, and supporting knowledge myself! But because of this, I can accelerate your learning by pointing you to the tasks that will give you the most understanding, break them down into the skills you need complete the tasks, and all the supporting knowledge that will enable you to complete that will give you the most understanding! I can maximize efficiency by showing you the simplest subtasks that yield the most benefit of knowledge. That’s exactly what I’ll do for the rest of this article.
Now that I’ve shown you the best way to learn blockchain programming, let’s put it into practice. Let’s start with the original question, “how does a blockchain application work?” As we said earlier, the main task that will answer this questions is to build a blockchain application. This can be broken down into smaller subtasks. The subtask that I want to focus on in this article is — sending ether from one account to another —. This is one of the most basic subtasks in developing decentralized applications on the Ethereum blockchain. It will teach you a lot about how the blockchain works, while simultaneously teaching you how to complete a fundamental programming task that you can build upon to accomplish more complex programming tasks.
Now that we have the task, to send Ether from one account to another. As promised, I’ll teach you the skill to complete the task first. Here is what the code looks like to complete this task:
web3.eth.sendTransaction({
  from: '0xa4c30e1546820aaddf2a50b0186bb35f985e9465',
  to: '0xa552bf81fa9540a2df205a6789d603fe3370563a',
  value: 1000000000000000000,
  gas: 21000,
  gasPrice: 10000000000
})
In order to complete this task, you simply need to execute this code in a JavaScript runtime environment that connects to an Ethereum client through Web3JS.
That’s the skill. Now, let’s examine all of the supporting knowledge that will teach you how to perform the skill yourself in order to complete the subtask, while simultaneously beginning to answer the larger question “how does a blockchain application work?” As I unpack the supporting knowledge, I will introduce several concepts that explain how this work. Some of these things might be obvious, but continue reading as you will learn something new as the explanation unfolds!
What is Web3.js?
As I mentioned previously, this code is written in JavaScript and can be executed in a JavaScript runtime environment with the Web3.js library, the main JavaScript library for talking to the Ethereum blockchain. It allows you to read and write data, as well as execute code on the Ethereum blockchain. In this particular code example, it’s writing new data by incrementing the balance of the `to` account and decreasing the balance of the `from` account.
Understanding how Web3.js talks to the Ethereum blockchain will give us insight into how the blockchain works and thus how to build a blockchain application. Web3.js talks to Ethereum by communicating with a single Ethereum node. This node acts on behalf of the entire network! A diagram of that relationship looks like this:

See, Ethereum is a peer-to-peer network where each node shares responsibility of maintaining the network. Each node gets a copy of all the data in the network, and each node participates in making sure that all of the data on each node is the same. This participation is referred to as Ethereum’s consensus algorithm. It is vital to ensure that each node has a copy of all the data on the network, and that there are no discrepancies because it keeps track of financial balances. In this code example, the network ensures that the balance of each account is correct! This is what makes blockchain technology so powerful.
In order to communicate with Ethereum, we only need to talk to one node because it acts on behalf of the entire network. We use Web3.js to do this. We can connect to an Ethereum node with a URL, and begin using the network itself! Once we have connected to this node, we can run the code from the code example above. When we do, it will send a message to the Ethereum node we’re connected to, and that node will broadcast the transaction to the entire network. Once the transaction is complete, the balance of the `to` account will increase, and the balance of the `from` account will decrease. All of the nodes on the network will update their data to reflect this change in account balances to ensure that they are accurate.
If you want to learn how to connect to an Ethereum node with Web3.js and run this code yourself, you can check out this article and video series where I teach you the basics of Web3JS from scratch:

How does a blockchain application work?
Now that you understand how to communicate with the Ethereum blockchain, you’ve unlocked one of the major puzzle pieces into building a dApp, a “decentralized application”, or a blockchain application. These all essentially mean the same thing. Some say that an application is only a dApp if it is fully decentralized in every way, but for the sake of instruction, let’s say that a dApp or blockchain application is any application that incorporates the blockchain in some way.
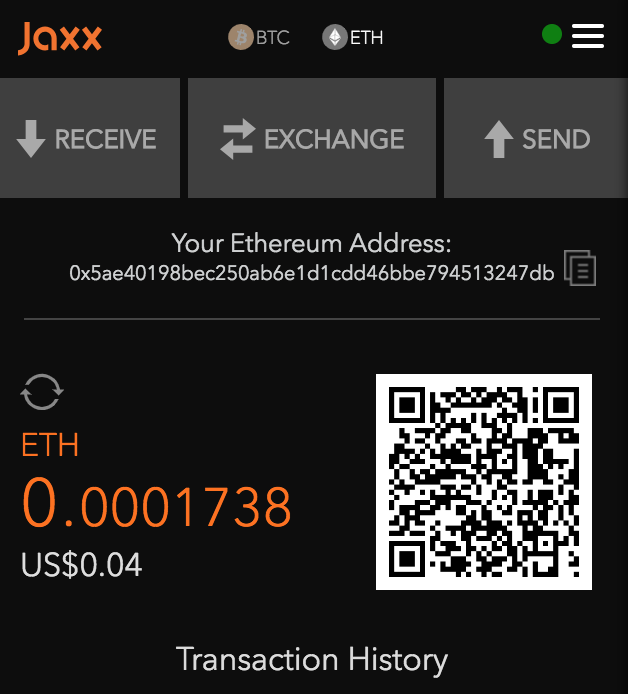
With this understanding and the previous code example, you have the fundamental building blocks for building a very simple blockchain application, like an Ethereum wallet client like Jaxx.
There are more features that you need in order to build a production-ready cryptocurrency wallet, like the ability to see account balances and transaction history, and possibly even support other cryptocurrencies. But understanding this code example and how to use Web3JS will get you started simply sending Ethereum cryptocurrency from one account to another.
Understanding this will give you insight into the inner workings of many different dApps or blockchain applications. Most of the blockchain based applications currently use centralized servers or clients that talk to he blockchain with something like Web3.js. In fact, that’s how many cryptocurrency exchanges work. They simply generate accounts for each user registered in their application, and manage sending Ether between these accounts based upon sell/buy orders and also their deposit/withdraw functionality.
How do accounts work?
One of the big differences in blockchain applications vs traditional web applications is that accounts are managed by the network itself, not necessarily the individual application. For example, in a traditional web application like Gmail, you create a username and password that is stored in a database owned by Google. When you use the blockchain, you have an account that represents you as a user of the entire network, not just the application. Your account is identified by an address, which is a representation of its public & private key pair.
An Ethereum account address looks like this:
0xa4c30e1546820aaddf2a50b0186bb35f985e9465In fact, this is the `from` account from the above code example. This account address is represented by a hex string. It has an associated account balance in Ether. Whenever you run the code example, you are essentially sending money from one user on the network to another user.
The account hex that I mentioned above is a representation of the user’s public key. This is kind of like a username. Additionally, this user has a “password”, which is the corresponding private key. Private keys are sensitive data, and should be treated just like passwords: kept secret and never shared. Private keys are used to deterministically generate public keys by running them through a cryptographic hashing function. Because the private key has been encrypted to generate a public key, and cannot be decrypted, the public key and corresponding account address are safe to share, just like your username!
What is Ether?
What is Ether? Ether is the native cryptocurrency of the Ethereum blockchain. It is the value that gets transferred whenever you send value from one account to another. You can see the ether amount expressed in the previous code example in the `value` field:
value: 1000000000000000000While this number is quite large (it has 18 0’s), it represents 1 Ether. See, the large number you see above is expressed in Wei, the smallest unit of Ether. This is kind of like the penny to the US dollar, but a very tiny penny. 😃 Ether can be divided by 18 decimal places to get 1 Wei, where the US Dollar can be divided by 2 decimal places to get 1 penny.
The Ethereum network performs all cryptocurrency calculations in Wei because it does not deal with any decimal places at a computational level. That’s why the value expressed in the code example is so large, because we don’t want to use any decimals.
Also, what is Ether and how does it differ from other cryptocurrencies? Ether is much like Bitcoin because it is the native cryptocurrency of its own network. It can be mined as well as sent to other accounts on the network. Ether is different from the Tokens that are built upon the Ethereum network because these tokens are controlled by smart contracts, and not by the network or miners.
What is Gas?
Whenever you interact with the Ethereum blockchain, you are either reading data from it or writing data to it. Reading data from Ethereum is free, but writing to it costs money. This money is called “gas” and is paid in Ether by the account that initiates the transaction.
Why must you pay a gas cost to create a transaction on the Ethereum network? Because Ethereum is a peer-to-peer network of nodes, not a centralized system, people who run nodes are incentivized by payments to participate in the network. These nodes who participate in writing data to the Ethereum blockchain are called “miners”. They are paid to write transactions because they incur costs to offer their computational resources to the network and are compensated by users who pay to send transactions. That is why you must pay to create transactions. I will explain this more in the next section!
You can see the gas specified from the code example above:
gas: 21000,
gasPrice: 10000000000
Let’s break this down. First, `gas` is the number of units of gas you are willing to pay to send the transaction. This is a limit. Any unused gas in the transaction will be refunded to the sender. I have specified 21000 units of gas here because that’s the exact amount of gas required to send Ether from one account to another.
Note, that 21000 units of `gas` does not mean 21000 Ether or Wei. Gas here is simply an abstract unit. The actual cost of gas is determined by the `gasPrice`. Users can specify the price they are willing to pay in order to send the transaction. The gas price here is 10Gwei which will result in a fairly quick transaction. That’s because the higher the gas price, the faster the transaction and vice versa. The actual Ether cost of the gas used by the transaction can be obtained by multiplying the `gas` by the `gasPrice`.
What is Proof of Work?
As I promised in the previous section, let’s revisit mining momentarily. This is a particular topic of interest for blockchain users who aren’t even programmers as a means of generating profits. Let me explain how the process works.
As I said before, Ethereum is a peer-to-peer network of nodes that share responsibility for maintaining all of the data on the network and running computations on the network. All of the nodes on the network contain a copy of the data on the network and participate in the consensus algorithm that ensures that all the data is secured an unchanged. However, a smaller subset of these nodes actually opt into the mining process. In other words, only some of the nodes on the network are actually miners.
So what do miners do? Whenever a transaction is broadcast to the network, the miners compete to complete a cryptographic puzzle. Essentially, they are presented with an encrypted message, and the miners try to “guess” what the unencrypted message is by running it through a cryptographic hashing function and comparing the result to the original message. The first miner to guess correctly writes the transaction to the blockchain and is awarded the Ether, or gas, paid by the sender. This is called “Proof Of Work” because the miner is able to prove that they solved the puzzle and wrote the transaction to the blockchain.
How Transactions work
Transactions are the basic records that are contained on the Ethereum blockchain. All of the transactions on the network are bundled together into blocks which are chained together to make the public ledger, or the blockchain itself. Whenever we sent ether in the code example above, we created a transaction:
web3.eth.sendTransaction({
...
})
This sending of a transaction creates a record that one account sent Ether to another. This transaction history is calculated to determine the balance of each account. For example consider the following scenario:
- Account A starts with 10 Ether
- Account B starts with 0 Ether
- Account A sends 4 Ether to Account B
- Account B sends 2 Ether back to Account A
This will create 2 transactions on the blockchain, which will be used to calculate the eventual account balances of each account. In this example, Account A will now have 8 Ether, and Account B will have 2 Ether.
Whenever an account is created, it is represented by a transaction hash. This allows us to identify all transactions on the network. Whenever we retrieve a transaction, we have access to a transaction receipt which gives us details about the transaction itself. If you run the above code example with a development blockchain, you will see a basic transaction receipt like this:
Transaction: 0x6188ad28056802077a707558894b751fca7b70dce3f567ce7c506250af679b79
Gas usage: 21000
Block Number: 7
Block Time: Wed Sep 26 2018 02:35:56 GMT-0500 (CDT)
So thats’s it! That’s the the task-oriented approach for learning blockchain programming: starting with a simple programming task that simultaneously teaches you a useful skill and gives you all the supporting knowledge you need in order to perform the skill and understand the bigger concept at play! Our round trip has been completed. 😃 This method can be applied to many other blockchain programming tasks. You can use it as a “rinse and repeat” strategy.
This “learn-by-doing” strategy is at the core of how I teach programming here at Dapp University. You can see this strategy in use in this 2 hour tutorial above where I teach you how to build your first decentralized application on the Ethereum blockchain step-by-step. You’ll learn the fundamentals of blockchain development by building an application. You’ll gain all the skills and supporting knowledge you need in order to become a blockchain programmer!
Happy with this tutorial? Then you NEED to join my free training here where I'll show you how to build a real world blockchain app so that you can become a highly paid blockchain developer!